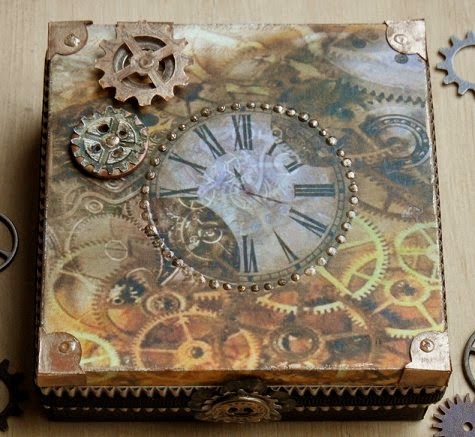
Continuing with the steampunk theme, here is my latest gift box. Perfect for small items of jewellery!
Showing posts with label Box. Show all posts
Sunday, 14 December 2014
Monday, 18 August 2014
DIY Display Shelf
I'd been looking to buy a small display shelf for some time; something to display my teapot boxes on, but I couldn't find anything suitable. In my mind's eye, I knew exactly what I wanted - something similar to a mini bookcase - so what did I do?
Of course, I made one!
And the best thing about this make, is that it cost me nothing, as I was able to reuse items and materials that I already had around the house.
So here's how I made it...
The entire structure of the display shelf was made using two box files.
I cut the front panels off with a sharp knife, then, using a screwdriver and a hammer, I carefully removed all of the fixings. I then glued and taped the two box files together. (Any holes that were left after removing the fixings I covered with a layer of tape.)
Next, I measured and cut out four shelves (two pairs) from the front panels using a sharp knife. I made sure that these would sit flush to the two sides. I stuck each pair of shelves together to make double the thickness then covered them with white wood-effect sticky-back plastic.
To add detail to the top, I also cut out a wavy line piece from the front panel, and covered it with the plastic. It sits flush and will be glued into place later.
I then covered the boxes with the white wood-effect sticky-back plastic. This can prove a little tricky, particularly in the corners, but it was worth the effort as it looks and feels stunning! (If you don't fancy the challenge of using sticky-back plastic, then spray painting it is an option, although the finish on the raw edges may not look so good.)
To keep the shelves in place, I cut out four small strips from one of the front panels, and covered these with the sticky-back plastic.
I stuck them in place on the two sides making sure they were straight and evenly spaced. I then rested the shelves on top of them (without glue) which then allows me to remove them if i wish to display something taller or to add a patterned backing paper.
So here it is finished. I really love how it looks, and it displays my teapot boxes perfectly.
And yes, not satisfied with making just one, I went ahead and made another one! Although this one has now been taken over by my son's collection of loom band bracelets!
Sunday, 20 October 2013
Monday, 14 October 2013
Candy Wrapper Crafts
Over the past few months I've been experimenting with a variety of different crafts, and I absolutely love this one. I never knew that sweet papers and crisp wrappers could be used to create such wonderful pieces.
Here are a few of my favourite creations ...
Wednesday, 25 September 2013
Teapot Box
I have always had a passion for teapots, so it was inevitable that one day I would combine my interests and create a box in the shape of a teapot.
Teapots come in all different shapes and sizes, but I wanted to create a classic design, an instantly recognisable form for my box. I had a hexagonal shape in mind, and so I set to work, sketching how my teapot should look before designing a simple template. After a bit of trial and error, it wasn't long before I was holding my very own teapot box.
I love the simplicity of this design, and the endless possibilities for decoration and embellishment.
With a removable lid, it can be filled to the brim with delicious treats - chocolates, candies, biscuits, teabags ... An ideal gift for any tea-lover!
Subscribe to:
Posts (Atom)


