Showing posts with label DIY favour. Show all posts

Wednesday, 25 October 2017

Doughnut Box Video Tutorial

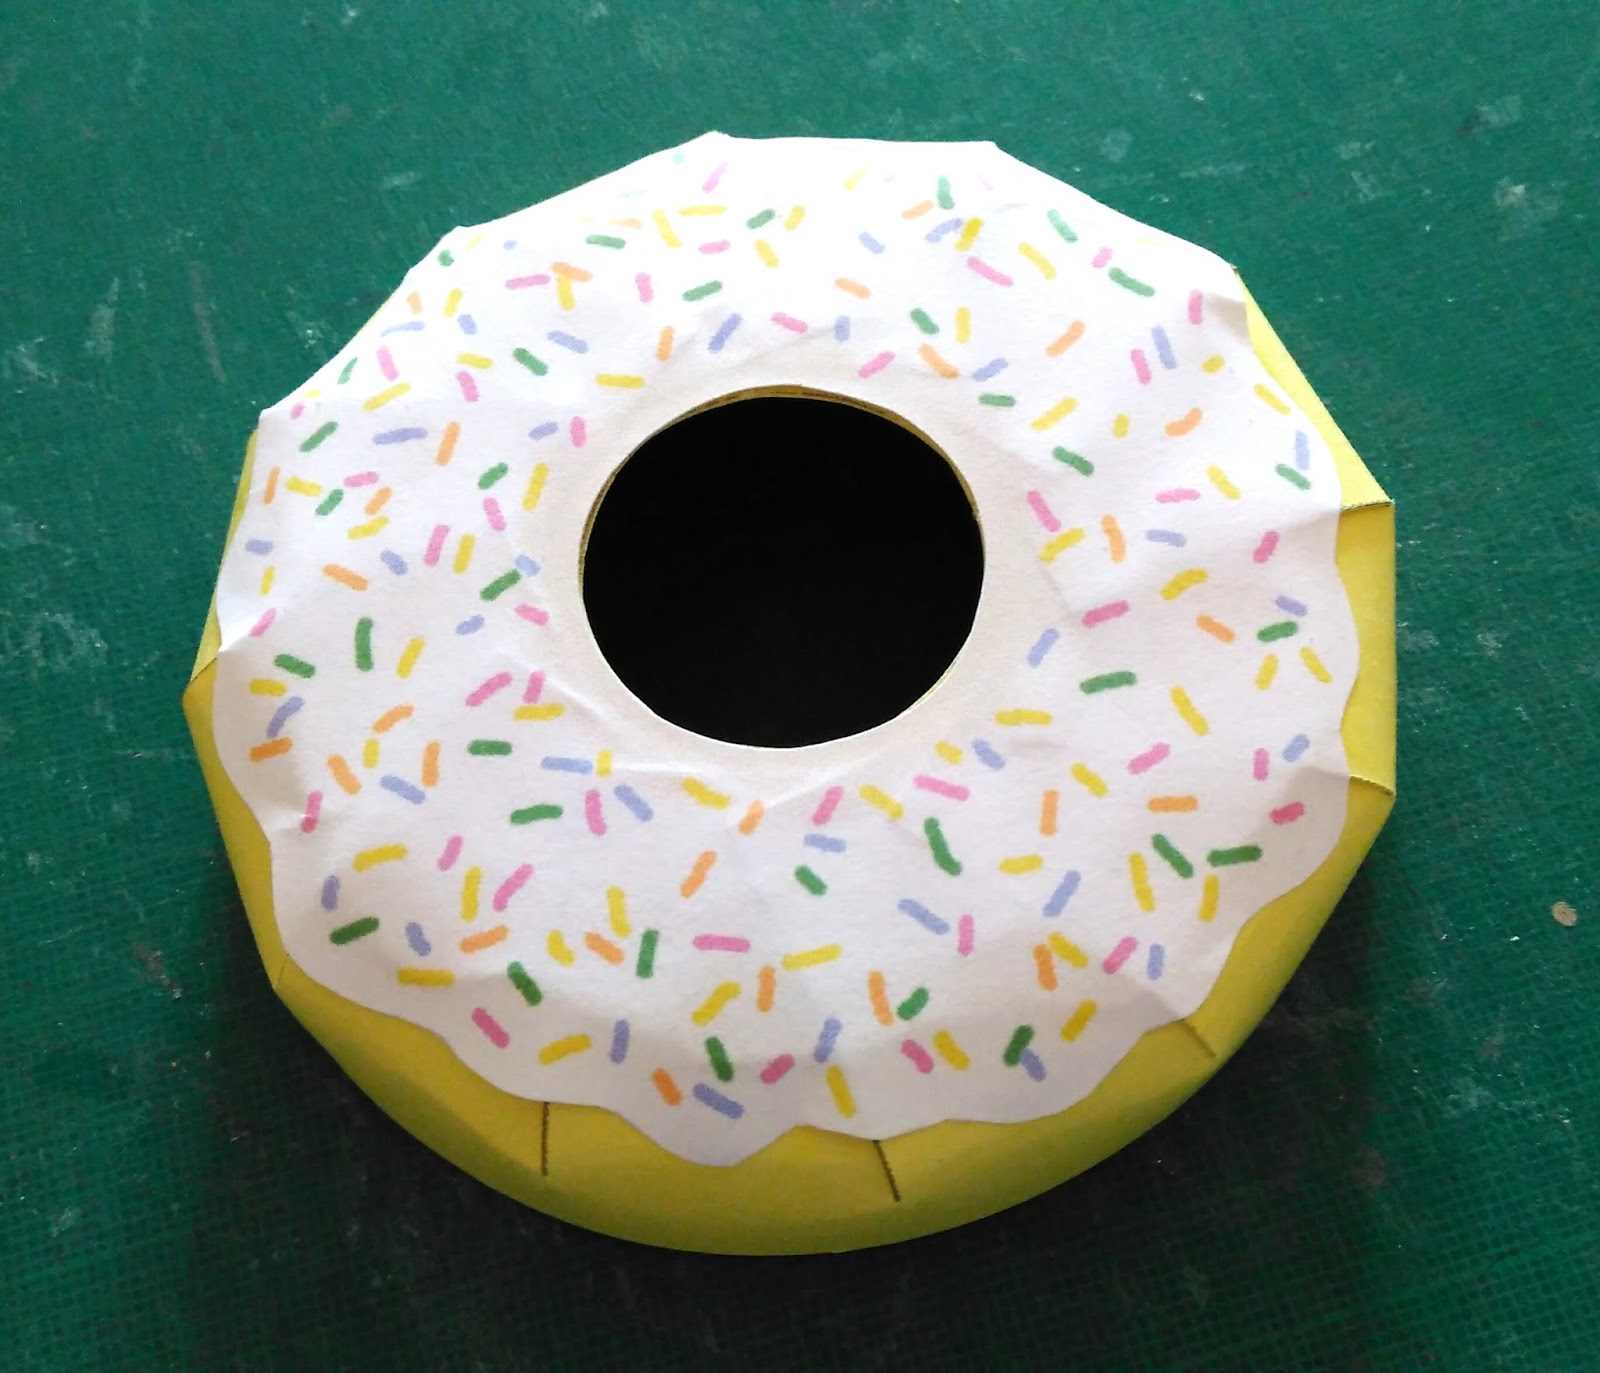
I have now created a step-by-step video tutorial showing how to create this doughnut-shaped box!


To make one of these for yourself, you will need:

I really hope you are inspired to make your own, and would love to see some of your creations.


Tuesday, 24 October 2017

Doughnut Box Template

Carrying on from my previous post, I am pleased to announce that my Doughnut Box template is now available in my Etsy shop. It comes as two PDFs - one for the doughnut box and one for the icing.


*UPDATE* I have now converted the templates to include SVG cut files so that they can also be used on digital cutting machines.


If you would like to make one of these amazing little boxes for yourself, then you will need:
  • The PDF templates
  • Coloured cardstock (180 - 220gsm double sided recommended)
  • White photo paper (90 - 180gsm glossy recommended)
  • Craft knife / scissors
  • Ruler
  • Double-sided tape
  • PVA glue

First, you will need to print the Doughnut Box template onto the coloured cardstock and the Doughnut Icing template onto the white photo paper. Then cut everything out.


Apply small amounts of double sided tape to the areas marked on the template. Then, starting with the base, stick the corner of the second flap onto the first, pressing it down firmly. Continue in this way, flattening the shape slightly as you go, until a circle is formed.


Secure the end tab with either glue or double-sided tape, and ensure that all tabs are securely stuck down.

Repeat with lid.


Next, using PVA glue, stick disc A onto the underside of the base, ensuring that the circle is in the centre.


Score and bend the centre tube flaps outwards and secure the ends together to form a tube. Push disc B over the tube and stick to the inside of the base with PVA glue.


Stick disc C to the inside of the lid, ensuring that the circle is in the centre. Next, apply plenty of PVA glue to your choice of icing and stick to the top of the lid, pressing all of the edges down firmly.


Your doughnut box is complete!


Doughnut-Shaped Box

Doughnuts. I love their simplistic form and the seemingly endless decorations that can be applied to them. So this started me thinking ... Can I create a box in the shape of a doughnut? A realistic one that opens and closes easily?

Challenge accepted!

I did a lot of research first into existing doughnut-shaped boxes, but could find nothing close to what I had in mind. (This is a good thing, as it means my design will be unique!) I then looked through lots of photos of doughnuts and started to plan out a simple design.

Here are some of my early prototypes:


After a bit of trial and error, and a few more design tweaks, I finally achieved the shape I wanted.


It really is a simple design, with the centre tube (hole) and the dripping icing giving it a realistic ring doughnut shape. There is space inside for some sweet treats, and it's easy to open and close.


I am now working on the template for this box, which will be available soon in my Etsy shop. 

*UPDATE* The templates for this doughnut box are available now as SVG cut files and PDFs.


What do you think of my design? Do you have a favourite doughnut icing / topping? What would you put inside the box? Let me know in the comments below.

Saturday, 15 August 2015

Teacup Template

To complement my Teapot Treats gift boxes, my matching teacup and saucer template is now available as a PDF download.


The template is designed to fit on A4 (but can be re-sized) which will make a teacup approximately 4.7 x 8 x 11cm. It has clear instructions (in English) and can be purchased through my Etsy shop.


To make one of your own, you will need:
  • PDF template
  • Patterened or coloured cardstock (200-250gsm recommended)
  • Craft knife / scissors
  • Scoring tool
  • Ruler
  • Craft glue / PVA
  • Embellishments (optional)

To add detail to these teacups, I also added a light touch of gold to the edges of the cup, handle and saucer.


For those of you who will soon be hard at work, crafting your own little tea sets, I would love to display some of your wonderful creations here!

Happy crafting!

Sunday, 2 August 2015

Minion Teapot Box

I was recently asked if I could make one of my teapot boxes in the style of a minion. It was for a friend's birthday party (based on favourite film characters) so how could I refuse?

An image of the finished teapot came instantly to mind, and so I set to work straight away, sketching how it would look.


The obvious starting point was the colour for the actual teapot. I chose a deep yellow cardstock, and using my template the main structure was soon created.

I added black ribbon to the base of the lid, making sure the raw edges were at the front (to be hidden later under the eye), and glued a few thin strands of black card (hair) to the top.


For the dungarees, I printed out a blue denim image and cut it to fit around the teapot base. I added two denim straps over the arms (handle and spout) and a pocket for the front. I drew on the buttons and the pocket logo and added some orange stitching for detail.

Now for the eye... What to use? At first I considered creating one totally out of card. But why bother, I thought, when a plastic bottle top would do!


After finding one the right size, I sprayed it silver and glued a printed (minion) eye to the inside. I then cut out a circle of silver card to cover the front, and glued a small circle of acetate to the inside. I then glued the finished eye to the front of the lid, making sure that the ribbon ran through the centre.

A little drawn on smile, and my minion teapot was complete!


It made me think that I could now create almost any kind of novelty teapot using my template - film characters included! My favourite so far though still has to be my Dr Who TARDIS teapot.


I wonder what I'll be creating next... maybe a two-eyed minion?

If you have been inspired to make your own little teapot boxes - for whatever occasion, and in any style - please visit my Etsy shop where you will find my template. I would love to see what you create using it!

Wednesday, 18 February 2015

Steampunk Tea Set

At last! Here it is. My matching teacup and saucer to complement my latest steampunk teapot.


I am thrilled with how this set has turned out!


The saucer has a small doily on it, delicately matching the top of the teapot lid. 


The perfect unique gift for any tea-lover.


Thursday, 15 January 2015

Retro Red Teapot

I love the vibrancy and the detail on this red teapot box. 


Perfect to display at any tea party, it can be filled to the brim with delicious treats!


Steampunk Teapot Box

Here's my latest steampunk-inspired teapot box. It's different, but I think it works...


I kept the keyhole in the front, as I really like that idea - I just changed the surround to an oval one, which compliments the circular top hat.

Now all I need is a matching teacup!

Monday, 1 December 2014

Steampunk Teapot

This is my first attempt at a steampunk teapot, and I am more than pleased with how it's turned out! 

After a little more research into steampunk design, I came up with this simple idea:


A bit of Rub 'n' Buff later and I am thrilled with the result:


A mini pressure guage on the lid replaces the flower on my usual teapot boxes...


and I cut the keyhole out of the front so that it is an actual hole. This would look great with a light inside it!

Monday, 24 November 2014

TARDIS Teapot Box

So excited about this one! As an avid Doctor Who fan, it was only a matter of time before I designed and created my own Doctor Who themed teapot gift box. And of course, what better to use as my inspiration than the TARDIS itself?!


I found the perfect colour cardstock, and using my PDF template, I decided to create a medium-sized teapot box. I made six individual side panels and printed the graphics to fit. I was definitely inspired by this image from a recent episode:


I am thrilled with the result!


Although the actual TARDIS is four-sided, the hexagonal form of this teapot fits in perfectly with the interior of the TARDIS and the central console ... I wonder if I could create a mini console to fit inside?