It's held closed with a length of raffia (or you could use ribbon), and once it's released, the box opens like an explosion of bees to reveal the gift inside!
Perfect for lovers of bees and any bee-themed celebrations, the template for this box is available through my Etsy shop as an SVG cut file, as well as a PDF if you prefer to cut out by hand. It also comes with two FREE digital papers!
To make one, you will need:
* Bee Hive Favour Box template (PDF and SVG available)
* Computer and printer to print the PDF template, the digital papers and instructions
* Digital cutting machine
* Photo quality paper (matte, 220-250gsm / 80-92lb recommended)
* Double sided cardstock (220-250gsm / 80-92lb recommended)
* Lighter card for the bees (216gsm / 80lb recommended)
* Craft glue / double-sided tape
* Ribbon
If you are not using a cutting machine, you will also need:
* Craft knife / scissors
* Scoring tool
* Ruler
Watch my video tutorial showing how to assemble the box, and follow the tips below.
TIP 1 : Print the two FREE digital papers that come with the template onto white photo quality matte card, approximately 220gsm (double-sided, one design on each side). You can watch my video tutorial showing how to print the papers here:
Alternatively, you can use any double-sided patterned card or just plain yellow card.
TIP 2 : You can either cut the circle out of dark brown cardstock to completely cover the inside of the hole, or use acetate to reveal just a sneaky peek as to what's inside the box! You could even leave the hole open!
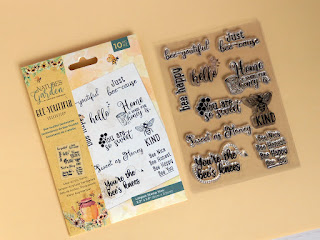
TIP 3 : You can stamp your own sentiment onto the gift tag. For mine, I used Nature's Garden Bee-Youtiful Sentiments Stamp Set by Crafter's Companion. I then lightly inked around the edges of the tag.
TIP 4 : Allow the tag to hang freely by keeping the attachment piece loose.
TIP 5 : When tying the box up for the first time, gently pull the three larger hexagons outwards and allow the three smaller hexagons to form a triangle in the centre.
TIP 6 : If you find assembling the bees just a little too fiddly, you can flatten the bees in Cricut Design Space so that they 'Print Then Cut'. Just remember to set it to bleed before sending it to your printer.
I hope that you are now inspired to create your own little bee hive boxes!
Happy crafting!
Suzanne


No comments:
Post a Comment