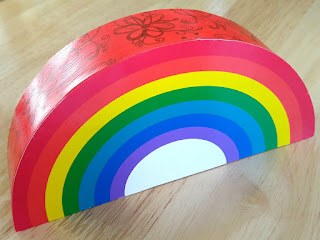
From one Pringles tube, you should be able to make three or four rainbow boxes using the measurements below. They could be used as jewellery boxes, keepsake boxes or unique gift boxes. They are incredibly sturdy, and you can decorate them however you wish!
To make your very own upcycled rainbow box, you will need:
* An empty Pringles Tube (wiped clean inside)
* Cereal box card (or used greeting cards)
* Ruler
* Pen
* Scissors and craft knife
* Strong, clear glue
* Glue stick
* Masking tape
* Coloured / patterned thin card
* Acrylic paint (or coloured marker pens)
* Acrylic gloss varnish
* Gold permanent marker pen
Watch my video tutorial to see me making the box, or simply follow the instructions below.
Begin by cutting the metal base off the Pringles tube using a craft knife.
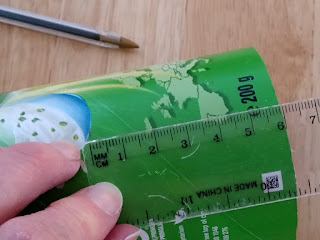
Then, using a ruler and a pen, mark 6cm from the base all the way around the tube.
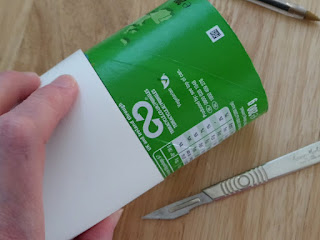
Wrap a piece of thin card around the tube at the 6cm marks and cut the tube (using the edge of the card as a guide) with a craft knife.
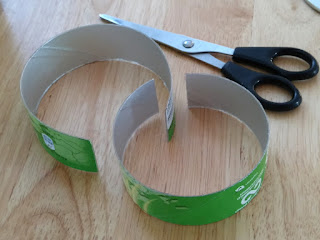
Next, cut the 6cm tube (as shown) using a craft knife or scissors.
Measure 3cm in and draw a line around the piece, then cut along this line using a craft knife or scissors.
Straighten out both ends of both pieces to form the shape of a rainbow arc.
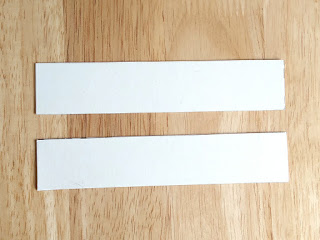
Next, cut four rectangular pieces of cereal box card (or used greeting card) 3cm x 15.2cm and glue them back to back so that you have two pieces that look like this.
Glue the short ends of the rectangles to the short ends of the arcs using strong glue.
TIP: Apply pieces of masking tape to hold them in position whilst they dry.
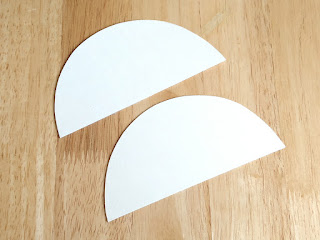
Once they are dry, draw around the arc shapes onto cereal box card and cut two of each shape out.
Alternatively, right click on the image below and save it. Then print it out and cut four semicircles out of cereal box card.
Glue the semicircles back to back so that you have two pieces that look like this.
Glue these onto the arcs using strong glue.
Next, cut two pieces of cereal box card 4cm x 22.5cm and glue them back to back.
Bend the card slightly, then glue it inside one of the arc pieces (this will be the base piece) and press it tightly against the curved edge.
Cut two rectangular pieces of cereal box card 4cm x 15cm and glue them back to back. Glue this inside the straight side of the base.
Tip: Hold the inner card pieces in place with some pegs until the glue dries.
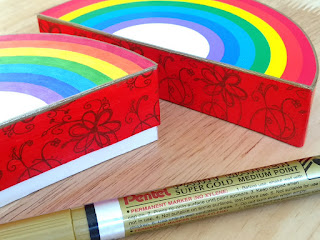
To decorate my box, I covered the sides with thin, patterned card using strong, clear glue. I then applied two layers of red acrylic paint over the patterned card and left it to dry.
Once it was dry, I covered the painted areas with a thin layer of acrylic gloss varnish.
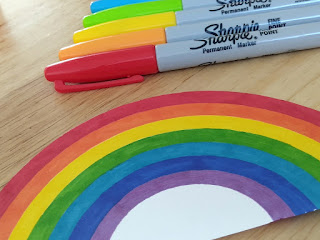
Next, I created this rainbow template and printed two of them onto glossy photo paper. If you right click on the rainbow image below and save it, you can then print two of them and cut them out.
I used a glue stick to attach the rainbows to the top of the lid and to the base. I then carefully trimmed off any excess with scissors.
Alternatively, you could create your own rainbow using paints, markers or scraps of coloured paper.
To finish, I added a line of gold around the edges of the rainbow with a gold permanent marker pen. This really enhanced the colours and gave it a neat, detailed appearance.
I really love how this box turned out. Hard to believe that it started life as a Pringles tube!











No comments:
Post a Comment