Showing posts with label upcycling project. Show all posts

Wednesday, 1 April 2026

Handmade Upcycled Greeting Cards

Welcome to another fabulous upcycling project! ♻️ This time, I'll be showing you how I turn used wall calendars into these stunning greeting cards!


Some of these cards are currently available in my NEW Etsy shop and come complete with a recycled brown Kraft envelope.

To make one of these cards, you will need:

* used wall calendar
* square greeting card blank measuring approximately 15cm x 15cm / 6" x 6" 
* square metal die measuring approximately 4cm x 4cm / 1.5" x 1.5"
* die cutting machine
* sticky note
* pencil
* ruler
* eraser
* craft glue
* brayer

If you are not using a metal die, you can make a simple template by cutting a 4cm / 1.5" square of card.

Watch my video tutorial showing how to make the greeting cards, and be sure to follow the tips below.


TIP 1 : Cut around the photos on the back of the calendar carefully, making sure that you leave a small border.

TIP 2 : Use a sticky note to hold the metal die in place. This is so that the glossy surface of the photos doesn't pick up any scratches from the cutting plates.

TIP 3 : Arrange the photos in a 3 x 3 formation so that they look balanced. I like to put similar colours on opposite sides and, if there are animals, I like to face them inwards towards the centre.

TIP 4 : Lightly draw two diagonal lines with a pencil from corner to corner to find the centre of the card. After gluing the first photo in place, any visible lines can then be rubbed out.

TIP 5: Leave a gap of approximately 0.5cm / 0.2" between each square.

Very often, the front and back covers of a wall calendar are printed on glossy card, which gives the greeting cards a lovely, shiny, professional finish!

Don't forget to check out my NEW Etsy shop for these cards and other upcycled gifts!

Happy upcycling! ♻️
Suzanne

Monday, 11 November 2024

Upcycled Greeting Cards: 3D Box Card Idea

I love upcycling. I love being able to turn something that would otherwise be thrown away into something else and giving it a whole new lease of life. Take this adorable owl pop-up box card for example!

I created the card from used greeting cards, gift tags and other repurposed materials. This is the front of the original greeting card, and as soon as I saw it, I knew exactly what I needed to do!


On the original card, the owl in the top right corner was already cut out and raised up on dimensional foam. I carefully removed the owl from the card with the foam still in tact, then carefully cut around the other five owls.

I then used red-liner tape on the back of those five owls to attach them to strips of repurposed acetate (food packaging). 


For the box card, the main structure was originally an old book cover and the decorative panels were scraps from another project. 

After carefully arranging the position of the owls, I attached them securely to the box card using red-liner tape. I then positioned the owl with the foam right at the back so that he's looking down over the other owls.

I then cut out four shiny gold stars from a used gift tag and attached two of them to thinner strips of repurposed acetate. I placed one on each side, then glued another one to the back panel using several layers of scrap card to raise it up.

I just love how the owls seem to be looking at each other! They are such characters!

I glued a white panel to the back of the box card and left it blank so that it can be used for a handwritten message.

I then stamped a 'hello' sentiment onto a scrap of white card, cut it out in the shape of a cloud and attached it to the front panel using small scraps of card to create dimension. I also added the other gold star and a sparkly gold heart from another used greeting card to complete the design.


Here is the box card from the side, showing that it will fold flat for easy posting. 

What do you think? It certainly has a truly unique, handmade quality about it, making it a beautiful one of a kind card!

How to Make an Upcycled Owl Box Card

Happy crafting!
Suzanne 🦉

Friday, 26 July 2024

Even More Upcycled Favour Bags!

Once again, I have been busy making more upcycled gift bags using my Butterfly Favour Bag template.

For this first one, I cut the front, back and side panels out of an old tissue box, then used a silver metallic marker pen around the edges before gluing them in place. To compliment the silver, I used silver glitter card for the handle panels.

Tuesday, 11 June 2024

More Upcycled Favour Bags!

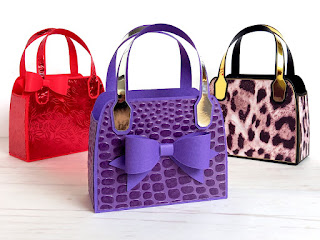
Following on from one of my previous posts, I have been busy making more upcycled gift bags using my Butterfly Favour Bag template.

The main structure of this stunning purple bag is made from an old school book cover! I then cut the front, back and side panels out of textured paper. The handle panels were cut from silver mirror card and the enlarged bow was made from another piece of the school book cover.

I think this is definitely one of my favourites! 💜


This red bag, along with its bow, also started life as a school book cover! I then cut all of the panels out of red mirror card and embossed them with a beautiful leaf design.


I cut the decorative panels on this black leopard print bag out of an old paper bag - you know, the ones you get from little gift shops. I first had to back the paper bag onto thin white card to give it some stability before cutting the panels out. I then ran a gold metallic marker pen around the edges, which perfectly compliments the gold mirror card handle panels.


Here's all three of them together, looking absolutely gorgeous!


I created these two white bags from old textured cardstock that I'd taken from another project. Don't they look amazing?! I love the look of white on white. There were a few imperfections on some of the panel pieces, so I embossed each of them using a knitted pattern design, which made them perfect! I then used the leftover scraps to make the little bow and the layered flower.


For this last bag, I cut the main black pieces out of an old art folder and the panels out of a tissue box. I cut the panels out by hand as I wanted to line the little dogs up so that the pattern was equal on both sides. I then ran a silver metallic marker pen around the edges and cut the handle panels out of silver glitter card to match. 


Whilst not all of the bags are made entirely from upcycled materials, it was a good chance to use up some of my cardstock scraps and experiment with different textures. 

So, which bag is your favourite now?


Happy crafting and happy upcycling! ♻️
Suzanne

Saturday, 5 August 2023

Upcycled Favour Bags

I've recently been experimenting with my butterfly favour bag template, seeing what other versions I could come up with, and just look at what I've created!

Aren't they fabulous!?

Most of the bags are decorated with small paper scraps, and I upcycled old greeting cards, Christmas crackers and card packaging for the others ♻️

My favourite has to be the Guinea pig bag, made using a tissue box.

I started by making the bag out of Kraft card, then I cut the front and back panels from the front and back of the tissue box and the two side panels from the picture on the base of the box. I went around the edges of the panels with a gold metallic marker pen before gluing them on, then cut the handle panels from gold mirror card.

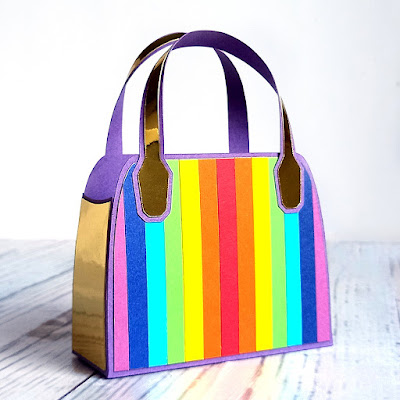
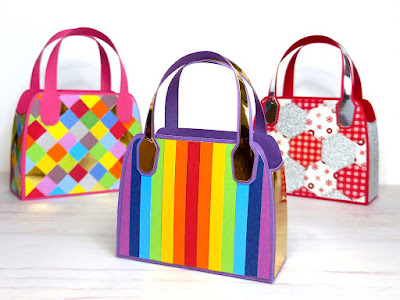
For this rainbow bag, I reduced the size of the template slightly and cut the main bag pieces out of an old school book cover. I then cut the front and back panels out of white copy paper. I found lots of different coloured cardstock scraps and cut them into thin strips. Then I glued the red strip down the centre of the front and back panels and filled the rest with the other colours. After trimming any ends off, I went around the edges with a gold metallic marker pen, then cut the two side panels and the handle panels out of gold mirror card.

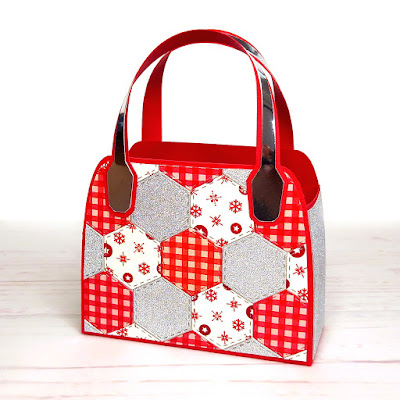
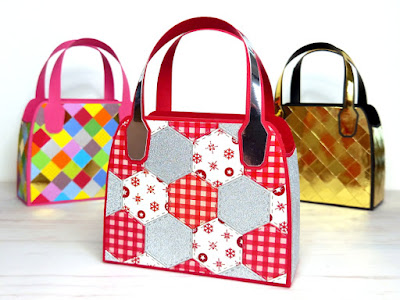
For this next one, I made the bag out of red cardstock, then cut a front and back panel out of white copy paper. I die cut small hexagons from old Christmas crackers (that I had saved from a couple of years ago) and glued them onto the panels to make a patchwork effect. I then cut the two side panels out of a larger piece of glittery, silver cracker and cut the handle panels out of silver mirror card.


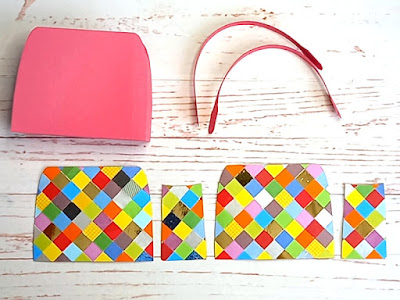
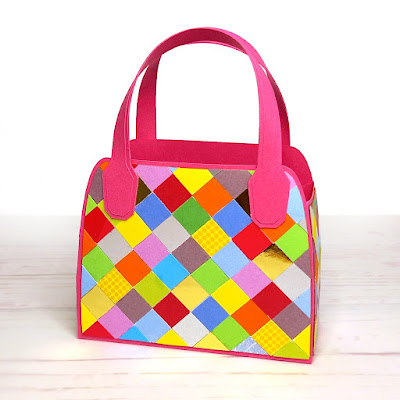
The pink card that I used for this next bag was an old A4 folder divider that I no longer needed. Again, I cut the front and back panels and two side panels from copy paper, then found lots of small scraps of cardstock, greeting cards and food packaging and punched out as many squares as I could using my 1.1cm square punch.

Call me obsessive, but I really wanted all of the edges to match up so that it looked like a candy wrapper bag, and here's how the panels looked once I'd finished.


Before I glued them on, I ran the panels through my Big Shot to flatten them and it gave them a nice smooth finish.


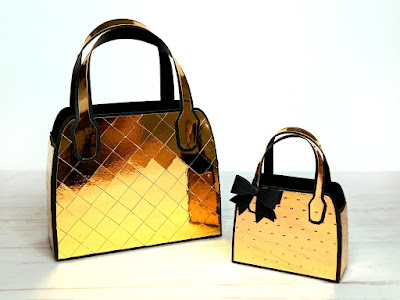
I made this next one in a similar way, using scraps of gold mirror card. Running these panels through my Big Shot created almost a matt finish, and I went around the edges with a gold metallic marker pen afterwards to hide the white core.

It's very similar to the mini gold handbags that I made using the same template.

I'm completely obsessed with making these bags now, and will definitely be making more!

Watch this space!

Suzanne

Friday, 3 June 2022

Tropical Handbag Gift Bag

Hello, and welcome to another upcycling tutorial! This time I will be showing you how to transform an ordinary, cheap gift bag into a fabulous, designer-worthy handbag gift bag!

Over the years, I've been given so many of these gift bags, and I've saved them, thinking that one day I will be inspired to create something new out of them. Now I can't wait to share with you what I've made, and show you how to make one for yourself!

Doesn't it look amazing! 😍

This is the gift bag that I started off with. The label on the base showed that it came from Tesco and was called T.Tropical Gift Bag, but as I was given it so long ago, I doubt if it's still available.


Take a look at my video tutorial below showing how I made the handbag!


Here's a close up view of the rosette on the front. The button was also repurposed from an old cardigan.

Tropical Gift Bag Handbag by Esselle Crafts

Here's a view of the handbag from the back.


It's still very roomy inside, and still folds flat!


I just love how the pattern on the two handles matches up perfectly!


I am so pleased with how this bag has turned out, and can't wait to get started on another one!