Showing posts with label paper craft. Show all posts

Wednesday, 1 April 2026

Handmade Upcycled Greeting Cards

Welcome to another fabulous upcycling project! ♻️ This time, I'll be showing you how I turn used wall calendars into these stunning greeting cards!


Some of these cards are currently available in my NEW Etsy shop and come complete with a recycled brown Kraft envelope.

To make one of these cards, you will need:

* used wall calendar
* square greeting card blank measuring approximately 15cm x 15cm / 6" x 6" 
* square metal die measuring approximately 4cm x 4cm / 1.5" x 1.5"
* die cutting machine
* sticky note
* pencil
* ruler
* eraser
* craft glue
* brayer

If you are not using a metal die, you can make a simple template by cutting a 4cm / 1.5" square of card.

Watch my video tutorial showing how to make the greeting cards, and be sure to follow the tips below.


TIP 1 : Cut around the photos on the back of the calendar carefully, making sure that you leave a small border.

TIP 2 : Use a sticky note to hold the metal die in place. This is so that the glossy surface of the photos doesn't pick up any scratches from the cutting plates.

TIP 3 : Arrange the photos in a 3 x 3 formation so that they look balanced. I like to put similar colours on opposite sides and, if there are animals, I like to face them inwards towards the centre.

TIP 4 : Lightly draw two diagonal lines with a pencil from corner to corner to find the centre of the card. After gluing the first photo in place, any visible lines can then be rubbed out.

TIP 5: Leave a gap of approximately 0.5cm / 0.2" between each square.

Very often, the front and back covers of a wall calendar are printed on glossy card, which gives the greeting cards a lovely, shiny, professional finish!

Don't forget to check out my NEW Etsy shop for these cards and other upcycled gifts!

Happy upcycling! ♻️
Suzanne

Sunday, 8 February 2026

LOVE Treat Box Template

This impressive LOVE treat box is the perfect way to add a little handmade happiness to your gift giving.


Designed with simplicity and creativity in mind, it can be filled with chocolate hearts, sweets, small gifts or thoughtful surprises for the people you love most ❤️


The templates for this heartfelt box come as SVG cut files, as well as printable PDFs if you prefer to cut out by hand.

Sunday, 26 October 2025

Christmas Stocking Gift Card Holder

If you've ever struggled to know what to buy someone as a gift, you will have undoubtedly opted for a gift card at some point. But how can you turn that gift into something fun and memorable? By making your very own personalised gift card holder, of course! 🎁

Four festive paper craft gift card holders in the shape of Christmas stockings decorated with snowflakes and bows

Disguised as a Christmas stocking, this interactive gift card holder is super easy to assemble and will bring an element of surprise to your gift recipient! 🎁

Four festive paper craft gift card holders in the shape of Christmas stockings decorated with snowflakes and bows

Sunday, 20 October 2024

Present Gift Card Holder

Sometimes it can be difficult to know what to buy someone special as a gift, and so you opt for a gift card. But how can you elevate your choice of gift into something fun and memorable? By making your very own cute gift card holder, of course! 🎁

Disguised as a wrapped present, this interactive gift card holder is super easy to assemble and will undoubtedly bring an element of surprise to your gift recipient! 🎁

Sunday, 29 September 2024

Santa Teapot Box

It's time for another teapot favour box design and, with Christmas fast approaching, I've created this one in the style of Santa Claus! 🎅🏻

Paper Craft Santa Claus Christmas Teapot Gift Box

Doesn't he look jolly! With a big, textured beard and a festive hat that doubles up as the lid, you're going to have such fun arranging his features and filling it with all sorts of delicious Christmas treats!

Paper Craft Santa Claus Christmas Teapot Gift Box

The templates come in both SVG and PDF format, making them accessible for a variety of crafting needs.

Tuesday, 28 May 2024

Tabby Cat Favour Boxes

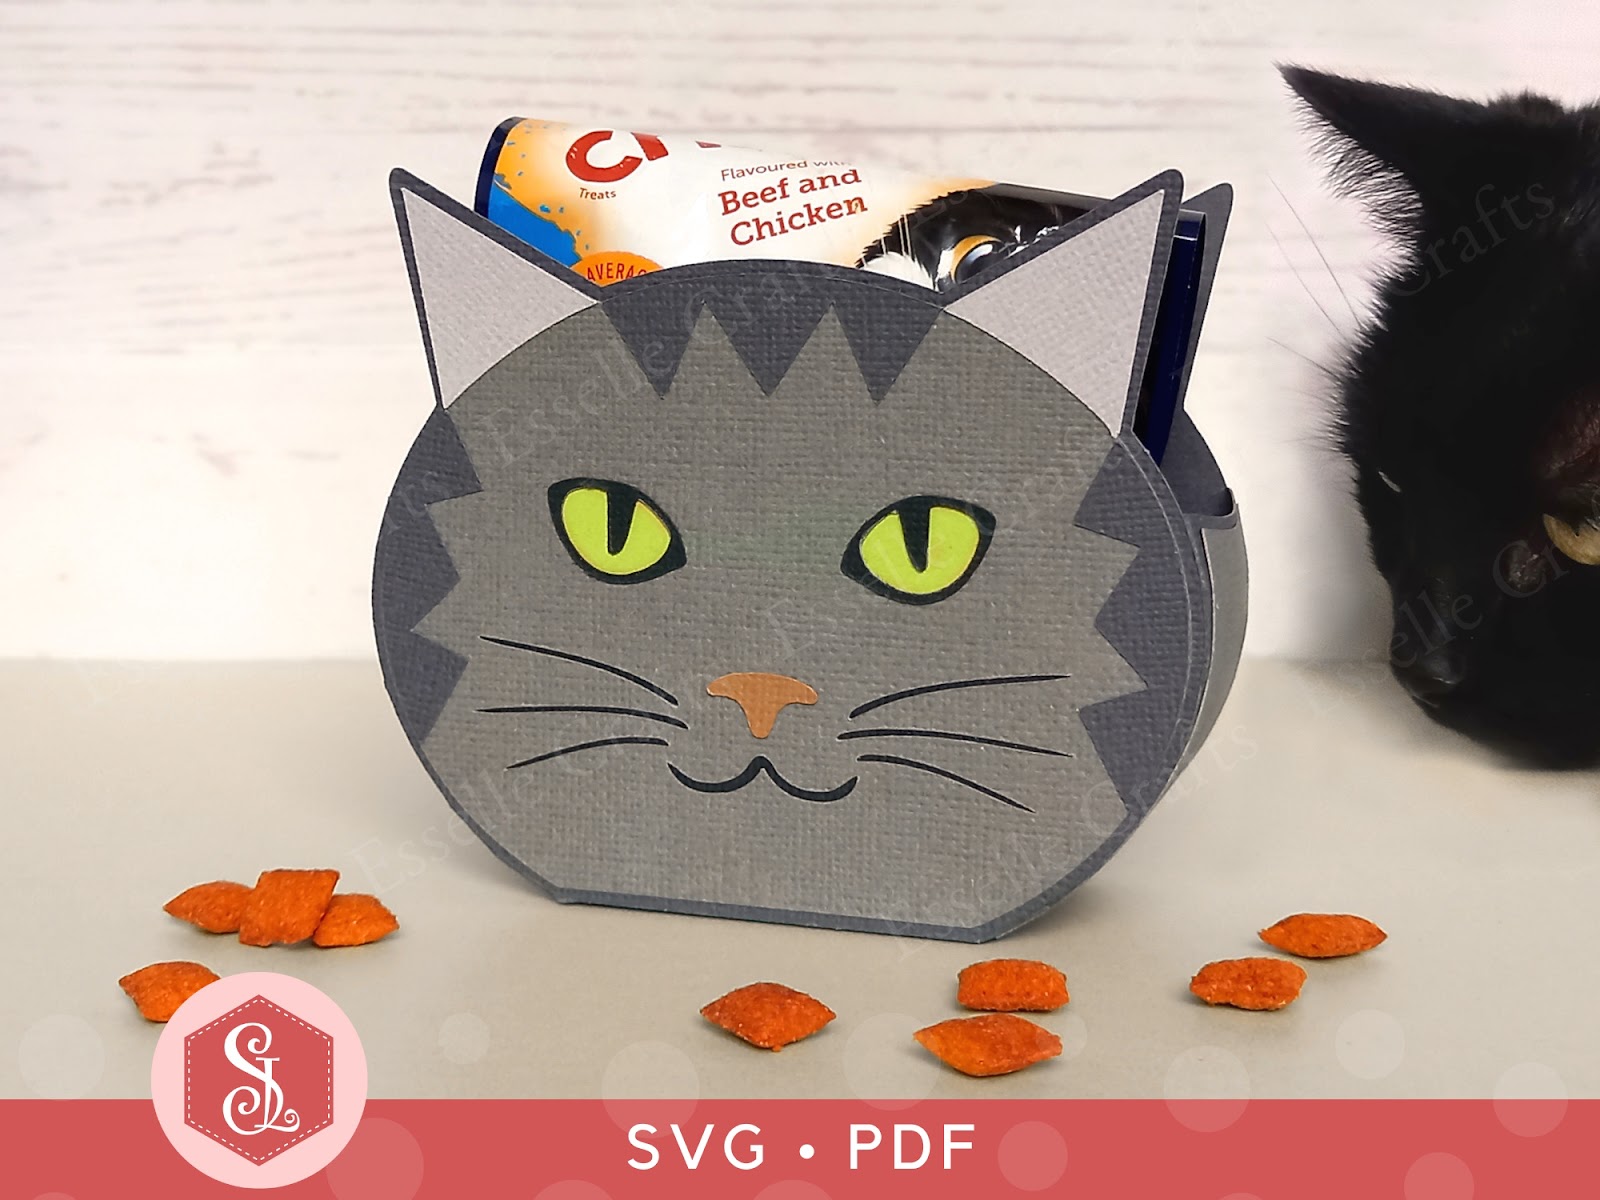
These little Tabby Cat Favour Boxes make the perfect gift box for any cat lover! Easy to assemble, you can make the tabby cat head in any colour you wish and adapt the colour of the eyes, nose, whiskers and stripes to match!


Ideal as little table favours or for a cat-themed party, you can fill them with sweets, chocolates or small gifts. You could even put some cat treats in them like I did - much to Prince's delight! 🐈‍⬛


Available from my Etsy shop, the template comes as an SVG cut file, as well as a PDF if you prefer to cut out by hand. 


PLUS you get an optional extra white face patch to create a bi-colour cat face!


To make one of these cat boxes, you will need:

* Tabby Cat Favour Box template (SVG and PDF available)
* Computer and printer to print the PDF templates and instructions
* Double-sided, textured cardstock (220-250gsm / 80-92lb recommended)
* Craft glue / double-sided tape

If you are not using a digital cutting machine, you will also need:

* Craft knife / scissors
* Scoring tool
* Ruler

Watch my video tutorial showing how to assemble the box and be sure to follow the tips below:


TIP 1 : After gluing the side panels on, gently curve the sides using your fingers or a bone folder before the glue dries. This will make assembling the box much easier and give it a neater finish.

TIP 2 : Make sure that the (white) whiskers / mouth panel and the (black) eyes panel completely cover the cut out sections. They should line up like this:


The cat boxes measure approximately 11cm (W) x 9.5cm (H) x 4cm (D)  /  4.3" (W) x 3.74" (H) x 1.6" (D), however, this is only meant as a guide, as the templates can easily be re-sized to suit your needs.

I hope that I have inspired you to create your own little Tabby Cat favour boxes using my template and I can't wait to see what you fill them with!

Suzanne

Thursday, 4 April 2024

Set of 15 Gift Tags

Get ahead of the gifting game with my fabulous gift tag bundle! You get all 15 shaped designs in SVG, PNG and PDF formats, giving you the option to cut them out using your digital cutting machine or to print them and cut them out by hand.

Using this instant download file, you can make and decorate your own gift tags for Chrsitmas! You can customize the tags for a themed celebration using your own colour scheme! Or how about using them for scrapbooking or journalling? There's also card making, jewellery price tags, clothing labels and all sorts of other papercraft projects that they could be used for!

Tuesday, 19 March 2024

Layered Butterflies

My Butterfly Favour Bag has been hugely popular recently and I've had several people ask if I have any other butterfly designs that could be added to the bag.


This is something that I'd considered doing when I designed the first one and so, as I loved doing it, I have designed three more!

The first one (that comes with the bag) is a likeness of a Small Tortoiseshell butterfly and the others are likenesses of a Peacock, a Monarch and a Speckled Wood butterfly.

I have the whole set of four butterflies available in my Etsy shop as SVG cut files as well PDFs if you prefer to cut out by hand.

They are so delightfully versatile and, as well as adding them to the favour bags, they can be used for all sorts of different papercraft projects.

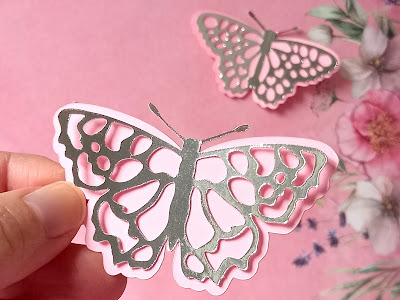
Here I've used two of them on a greeting card. 


The butterflies are super easy to assemble (consisting of only two layers) and look amazing with the top layer cut out of mirror card.

2 Layered Butterfly Designs by Esselle Crafts

I can't wait to see what you use them for! 🦋

Happy crafting
Suzanne

Wednesday, 13 March 2024

Business Card Box

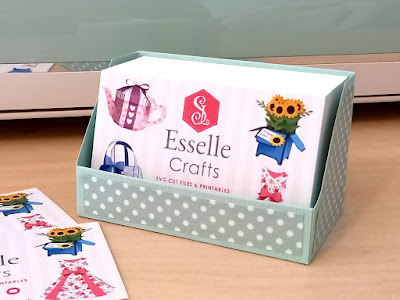
I recently updated my business card design to include my new website and some of my favourite 3D papercraft projects, and I'm so pleased with how it's turned out!

So, this got me thinking ... How can I safely store and present my lovely new set of 100 business cards, whilst keeping consistent with my brand?

And, of course, it had to be a handmade box!

This is how I made it ...

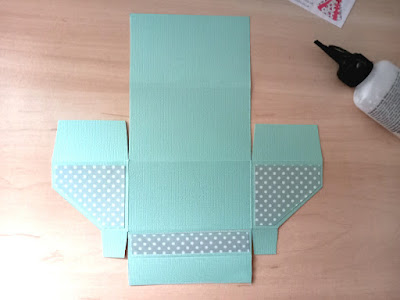
I started by measuring the set of cards and worked out that I needed a 20cm x 20cm piece of cardstock. I chose the lovely vintage mint green colour to match my brand (and my Cricut Explore 🥰). I then used my scoring board to score the lines shown below and drew the diagonal lines at the sides with a pencil.

I folded and burnished the score lines, then cut the tabs as shown below.

Next, I added some patterned paper panels to the front (measuring 8.5cm x 1.5 cm) and the two sides (measuring 4.5cm x 5cm with the diagonal lines at 1.5cm).

I then glued the two larger side tabs to the back.

Then glued the two smaller tabs to the front and folded the front over, gluing it in place for a neat finish.

I did the same with the back, folding it over and gluing it in place. This also gives the back extra strength.

I love how it looks, and I know that my business cards will now be safe and nicely presented for anyone who wishes to take one 🥰

Will you be giving this a try?

Happy crafting!
Suzanne