Showing posts with label printable PDF template. Show all posts

Tuesday, 28 May 2024

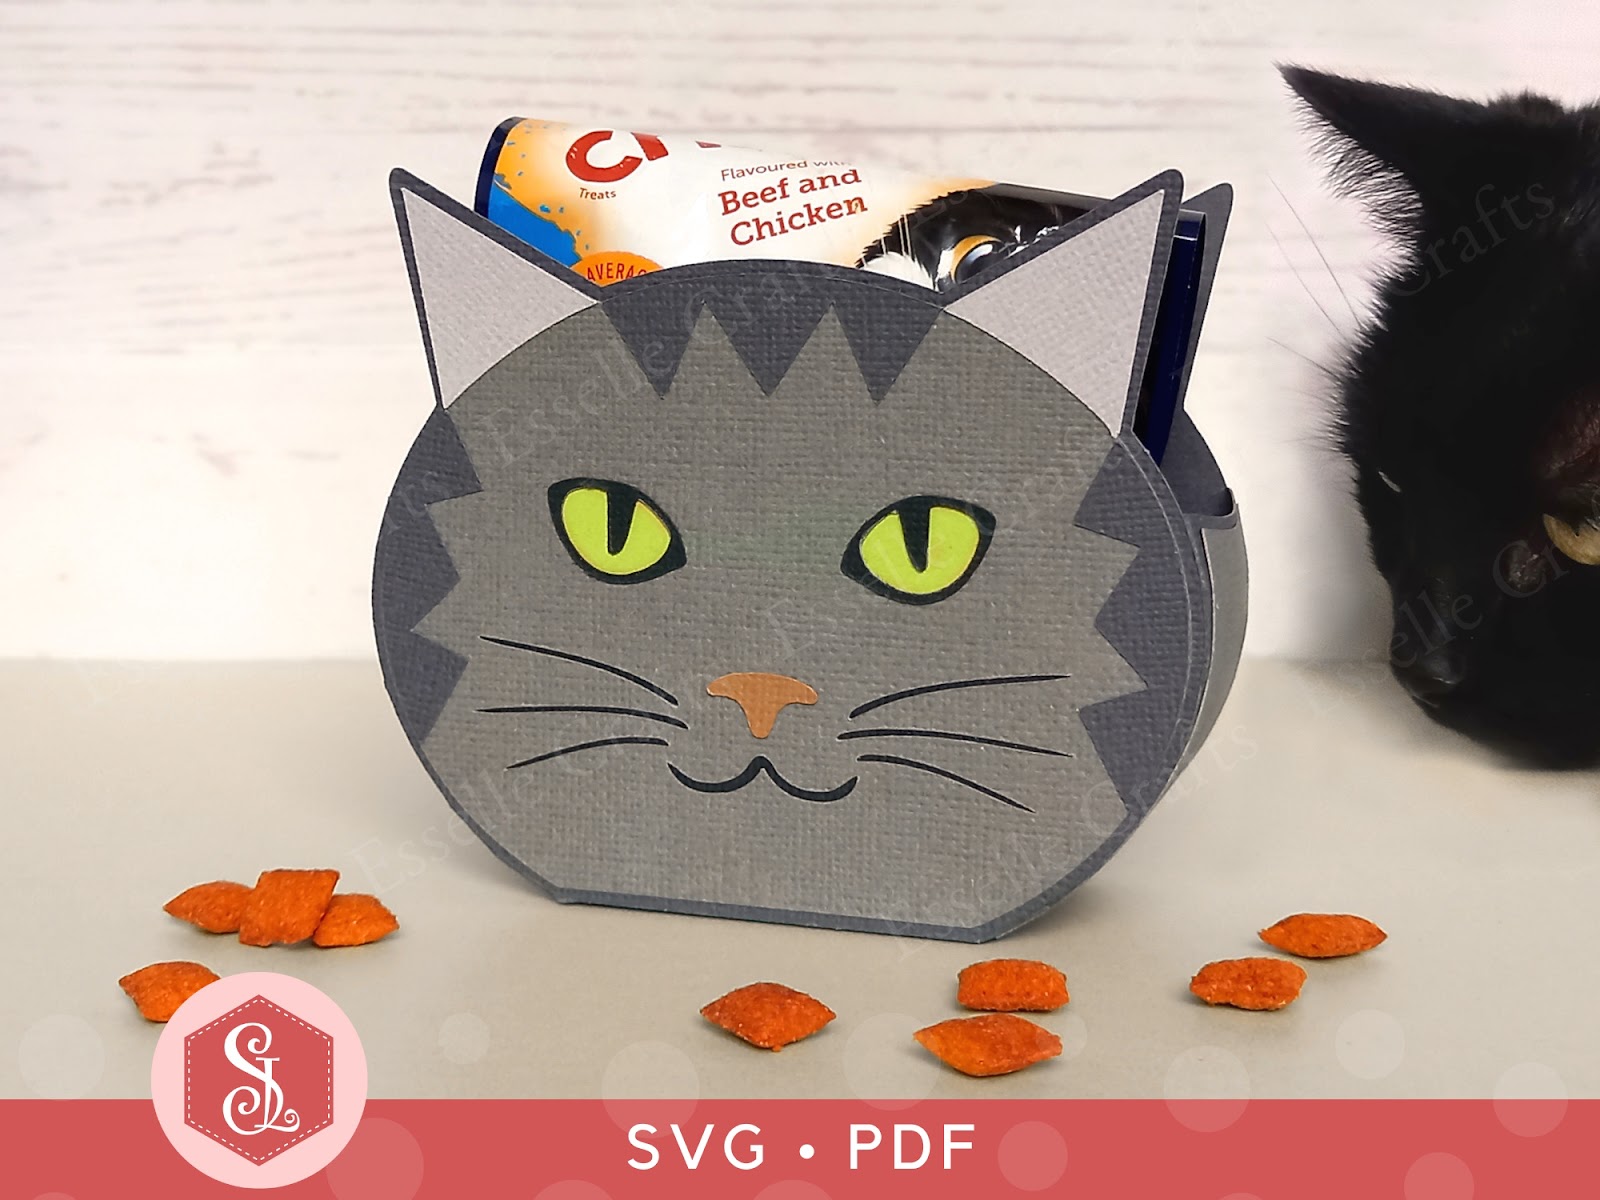
Tabby Cat Favour Boxes

These little Tabby Cat Favour Boxes make the perfect gift box for any cat lover! Easy to assemble, you can make the tabby cat head in any colour you wish and adapt the colour of the eyes, nose, whiskers and stripes to match!


Ideal as little table favours or for a cat-themed party, you can fill them with sweets, chocolates or small gifts. You could even put some cat treats in them like I did - much to Prince's delight! 🐈‍⬛


Available from my Etsy shop, the template comes as an SVG cut file, as well as a PDF if you prefer to cut out by hand. 


PLUS you get an optional extra white face patch to create a bi-colour cat face!


To make one of these cat boxes, you will need:

Tabby Cat Favour Box template (SVG and PDF available)
* Computer and printer to print the PDF templates and instructions
* Double-sided, textured cardstock (220-250gsm / 80-92lb recommended)
* Craft glue / double-sided tape

If you are not using a digital cutting machine, you will also need:

* Craft knife / scissors
* Scoring tool
* Ruler

Watch my video tutorial showing how to assemble the box and be sure to follow the tips below:


TIP 1 : After gluing the side panels on, gently curve the sides using your fingers or a bone folder before the glue dries. This will make assembling the box much easier and give it a neater finish.

TIP 2 : Make sure that the (white) whiskers / mouth panel and the (black) eyes panel completely cover the cut out sections. They should line up like this:


The cat boxes measure approximately 11cm (W) x 9.5cm (H) x 4cm (D)  /  4.3" (W) x 3.74" (H) x 1.6" (D), however, this is only meant as a guide, as the templates can easily be re-sized to suit your needs.

I hope that I have inspired you to create your own little Tabby Cat favour boxes using my template and I can't wait to see what you fill them with!

Suzanne

Tuesday, 19 March 2024

Layered Butterflies

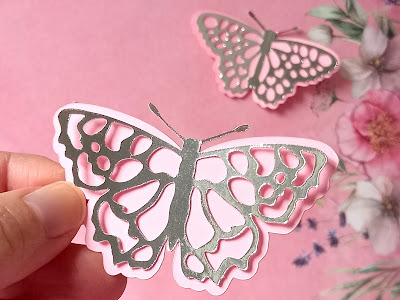
My Butterfly Favour Bag has been hugely popular recently and I've had several people ask if I have any other butterfly designs that could be added to the bag.


This is something that I'd considered doing when I designed the first one and so, as I loved doing it, I have designed three more!

The first one (that comes with the bag) is a likeness of a Small Tortoiseshell butterfly and the others are likenesses of a Peacock, a Monarch and a Speckled Wood butterfly.

I have the whole set of four butterflies available in my Etsy shop as SVG cut files as well PDFs if you prefer to cut out by hand.

They are so delightfully versatile and, as well as adding them to the favour bags, they can be used for all sorts of different papercraft projects.

Here I've used two of them on a greeting card. 


The butterflies are super easy to assemble (consisting of only two layers) and look amazing with the top layer cut out of mirror card.

2 Layered Butterfly Designs by Esselle Crafts

I can't wait to see what you use them for! 🦋

Happy crafting
Suzanne

Sunday, 19 June 2022

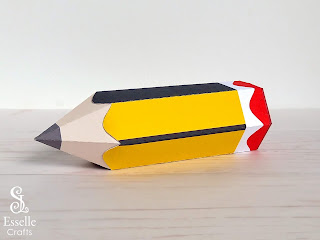
PDF School Pencil Box with Eraser

After recently introducing you to my School Pencil Favour Box PDF template, I have now created a slightly different version, depicting a pink eraser on the end!


Easy to open and close, it can be filled to the brim with sweets or small treats. Ideal for stationery addicts, teacher gifts, back to school gifts, graduation gifts and more!

Monday, 11 April 2022

PDF School Pencil Box

I have now created a full colour PDF template for my School Pencil Favour Box, an idea that I first introduced to you here.

Easy to open, these super cute school pencil boxes can be filled to the brim with sweets or small treats. Ideal for stationery addicts, teacher gifts, back to school gifts, graduation gifts and more!

School Pencil Favour Box by Esselle Crafts

Friday, 16 April 2021

24oz Paper Teacup

Recently, I was asked if it was possible to create a large, 24oz teacup using my Teacup and Saucer favour box template. Not a problem, I replied, and to prove it, here's one that I made!

Ok, so I admit it doesn't look very interesting here, having been made entirely out of plain white cardstock, but it provided me with an enticing blank canvas to build upon ... 

And just look at it now!

Saturday, 23 January 2021

Heart Favour Box

This adorable little heart favour box has an envelope-style lid and can be filled to the brim with sweets or small treats. Easy to assemble, it is perfect for Valentine's Day, wedding table favours, bridal showers and so much more!


Complete with a heart and a cute paper bow, the templates for this box come in both SVG and PDF format, making them accessible for a variety of crafting needs.

Saturday, 28 November 2020

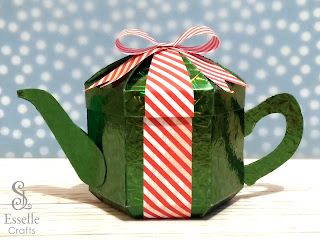
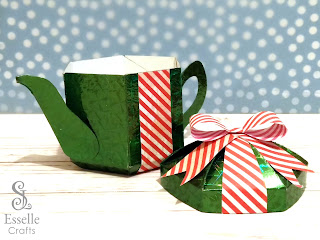
Present Teapot Box

Following on from my Christmas pudding teapot box, my reindeer teapot box and my snowman teapot box, I can now reveal the last of my NEW Christmas themed teapot boxes!

Perfect for gifting sweets or small treats, this gorgeous little present teapot box is all wrapped up and ready to make someone smile! And the best thing is, it can be customized for any occasion.

Sunday, 22 November 2020

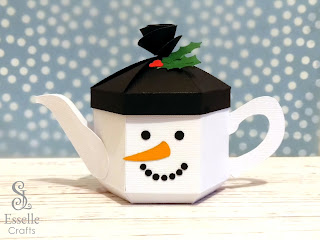
Snowman Teapot Box

Following on from my Christmas pudding teapot box and my reindeer teapot box, I can now reveal the third of my NEW Christmas themed teapot boxes!

Perfect for gifting sweets or small treats, this cute little snowman teapot box is bursting with Christmas cheer, and is guaranteed to raise a smile!

Wednesday, 18 November 2020

Reindeer Teapot Box

Following on from my Christmas pudding teapot box, I can now reveal the second of my NEW Christmas themed teapot boxes!

Reindeer Teapot Box by Esselle Crafts
    
Perfect for gifting sweets or small treats, this cute little reindeer teapot box is full of Christmas cheer.

Sunday, 15 November 2020

Christmas Pudding Teapot Box

With the festive season fast approaching, I am excited to finally reveal one of my NEW Christmas themed teapot boxes!


Perfect for gifting sweets or small treats, this adorable Christmas pudding teapot box has all the character of a real Christmas pudding. It's white icing lid looks as though it's dripping down the sides, and a little sprig of holly and berries adds a colourful finishing touch.

Wednesday, 3 July 2019

Cactus Favour Box

Introducing my latest favour box design! These cute little cactus boxes are easy to assemble, and have plenty of room inside for delicious sweets or small treats! 


Similar in style to my cupcake favour boxes, I used a hexagonal design for the plant pot base and created the cactus as part of the lid.


The PDF templates are available now from my Etsy shop, and are designed for use on A4 card (200-250gsm recommended), however they can be re-sized before printing.

*UPDATE* I have now converted the templates to include SVG cut files so that they can also be used on digital cutting machines. See my new blog post here.


If you don't want to use them as favour boxes, they would look great displayed upon a shelf as little storage boxes.


To make your very own little cactus boxes, you will need:

  • Computer and printer to print the PDF templates
  • White photo paper (200-250gsm recommended)
  • Scraps of coloured paper
  • Craft glue / PVA
  • Craft knife / scissors
  • Scoring tool
  • Ruler

Approximate dimensions of base: 8 x 7 x 5.5cm

Approximate height of lid and base together: 12cm (without a flower)

Watch my video tutorial showing how to assemble the cactus box: 


As part of the template I have included an outline for the flower so that you can choose whatever colour flowers you wish to have on top of your cactus boxes. Alternatively, you can make them without a flower. I used up some scraps of coloured paper for my flowers, but if you have a particular colour for your party or celebration, then you can customise the flowers however you wish!

Wednesday, 4 April 2018

Beach Hut Box Tutorial

Beach Hut Favour Boxes for Beach Theme Party Gifts

My latest video tutorial shows how to assemble my beach hut favour box. The printable PDF templates are available on my Etsy shop and are really simple to put together.

To make the boxes, you will need:
  • Beach Hut Box PDF templates
  • White photo paper or cardstock (matte 220-250gsm / 80-92lb recommended)
  • Craft knife / scissors
  • Scoring tool
  • Ruler
  • Craft glue / double-sided tape
Perfect for holding sweets or small treats, these little boxes look great lined up in a row and can be used for beach-themed parties and birthdays.

Beach Hut Favour Boxes for Beach Theme Party Gifts

Happy crafting!
Suzanne

Wednesday, 25 October 2017

Doughnut Box Video Tutorial

I have now created a step-by-step video tutorial showing how to create this doughnut-shaped box!


To make one of these for yourself, you will need:

I really hope you are inspired to make your own, and would love to see some of your creations.


Tuesday, 24 October 2017

Doughnut Box Template

Carrying on from my previous post, I am pleased to announce that my Doughnut Box template is now available in my Etsy shop. It comes as two PDFs - one for the doughnut box and one for the icing.


*UPDATE* I have now converted the templates to include SVG cut files so that they can also be used on digital cutting machines.


If you would like to make one of these amazing little boxes for yourself, then you will need:
  • The PDF templates
  • Coloured cardstock (180 - 220gsm double sided recommended)
  • White photo paper (90 - 180gsm glossy recommended)
  • Craft knife / scissors
  • Ruler
  • Double-sided tape
  • PVA glue

First, you will need to print the Doughnut Box template onto the coloured cardstock and the Doughnut Icing template onto the white photo paper. Then cut everything out.


Apply small amounts of double sided tape to the areas marked on the template. Then, starting with the base, stick the corner of the second flap onto the first, pressing it down firmly. Continue in this way, flattening the shape slightly as you go, until a circle is formed.


Secure the end tab with either glue or double-sided tape, and ensure that all tabs are securely stuck down.

Repeat with lid.


Next, using PVA glue, stick disc A onto the underside of the base, ensuring that the circle is in the centre.


Score and bend the centre tube flaps outwards and secure the ends together to form a tube. Push disc B over the tube and stick to the inside of the base with PVA glue.


Stick disc C to the inside of the lid, ensuring that the circle is in the centre. Next, apply plenty of PVA glue to your choice of icing and stick to the top of the lid, pressing all of the edges down firmly.


Your doughnut box is complete!