Thursday, 30 December 2021

Updated Pencil Box

Hello, and welcome to my final blog post of 2021!

Towards the end of this year I started making some of my pencil favour boxes for end of term gifts, and it occurred to me that instead of just using a patterned cardstock for the main piece, I could use a plain colour cardstock as a base and add some patterned paper panels on top to give it a smoother, cleaner look. The extra layer also provides added strength to the main part of the box.

3D Paper Craft Pencil Favour Box

Doesn't this one look amazing with its delicate Christmas paper panels? 

Friday, 29 October 2021

Red Telephone Teapot Box

I first made one of these red telephone teapot boxes about a year ago, but I have only just got around to designing the template for it. It was a bit tricky to work out at first, but with a bit of trial and error, and a lot of determination, I am absolutely thrilled with the results!


There are two different versions of the template included in the download. The one pictured above, with the OPEN windows, is designed for using acetate windows so that you can see through it, like a real telephone box. You might want to use this version with little lights inside and display it on a shelf or a windowsill.

Saturday, 2 October 2021

Cuboid Gift Box

I've been asked several times whether it's possible to make a rectangular (cuboid) box using my heart favour (cube) box template.

Well, the answer is yes! And here's the result!

Aren't they cute?

Watch my video tutorial to see how I converted my cube box template:


To make one of these boxes, you will need:

* Heart Favour Box template (PDF and SVG available)
* Computer and printer to print the PDF template and instructions
* Digital cutting machine
* Double-sided cardstock / patterned card (220-250gsm / 80-92lb recommended)
* Lighter, double-sided card or paper for the bow )160-220gsm / 60-80lb recommended)
* Craft glue / double-sided tape

If you are not using a cutting machine you will also need:

* Craft knife / scissors
* Scoring tool
* Ruler

Although I converted my SVG template in Cricut Design Space, you could just as easily use the PDF template and stretch it (resize the width only) using something like Photoshop, before printing it out.

Let me know how it goes, and maybe I'll try a tall rectangular box next time, by resizing the height instead!

Suzanne

Saturday, 18 September 2021

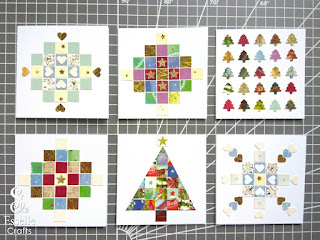
DIY Christmas Cards - Easy Upcycling

In my previous post, I showed you how to make an upcycled mosaic desk tidy from used greeting cards. I had lots of those little punched squares left over, so I decided to use them to create my own little Christmas cards!

Upcycled Christmas Cards by Esselle Crafts

Sunday, 12 September 2021

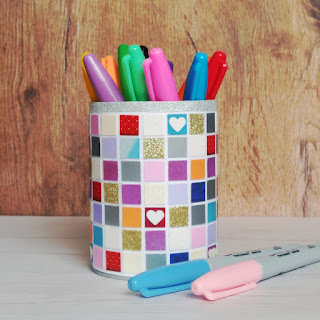
Mosaic Desk Tidy - Easy Upcycling

Following on from my previous post, showing how to create hanging star decorations from used Christmas cards, the next upcycling project I'd like to share with you is this stunning mosaic desk tidy!

Mosaic Desk Tidy by Esselle Crafts

Again, I have used my old Christmas cards here, together with a few other greeting cards that I had saved, but you could just as easily use scraps of coloured cardstock. 

Saturday, 4 September 2021

DIY Upcycled Hanging Star Decorations

For the last few weeks I've been sorting through my huge pile of used Christmas cards, wondering what I could possibly do with them...

Used Christmas Cards

Most of them had glitter on them and were donated to me last year because they couldn't be recycled. So I started to come up with some ideas of how to upcycle them into new creations. The first of which is these fabulous hanging star decorations!

DIY Upcycled Christmas Card Hanging Star Decorations

Sunday, 22 August 2021

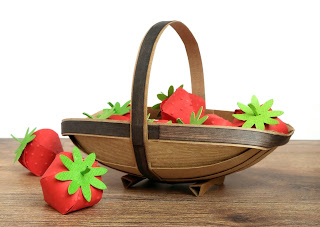
Strawberry Trug

I am super excited about introducing you to this little trug basket!

Strawberry Trug by Esselle Crafts

I tried to keep the style of the trug very close to the Sussex trug, which is where I live. It is traditionally made up of seven base boards, two rim pieces, a handle and two feet. I needed to make slight adjustments to get the template to work, but overall I am extremely pleased with how it has turned out!

Sunday, 15 August 2021

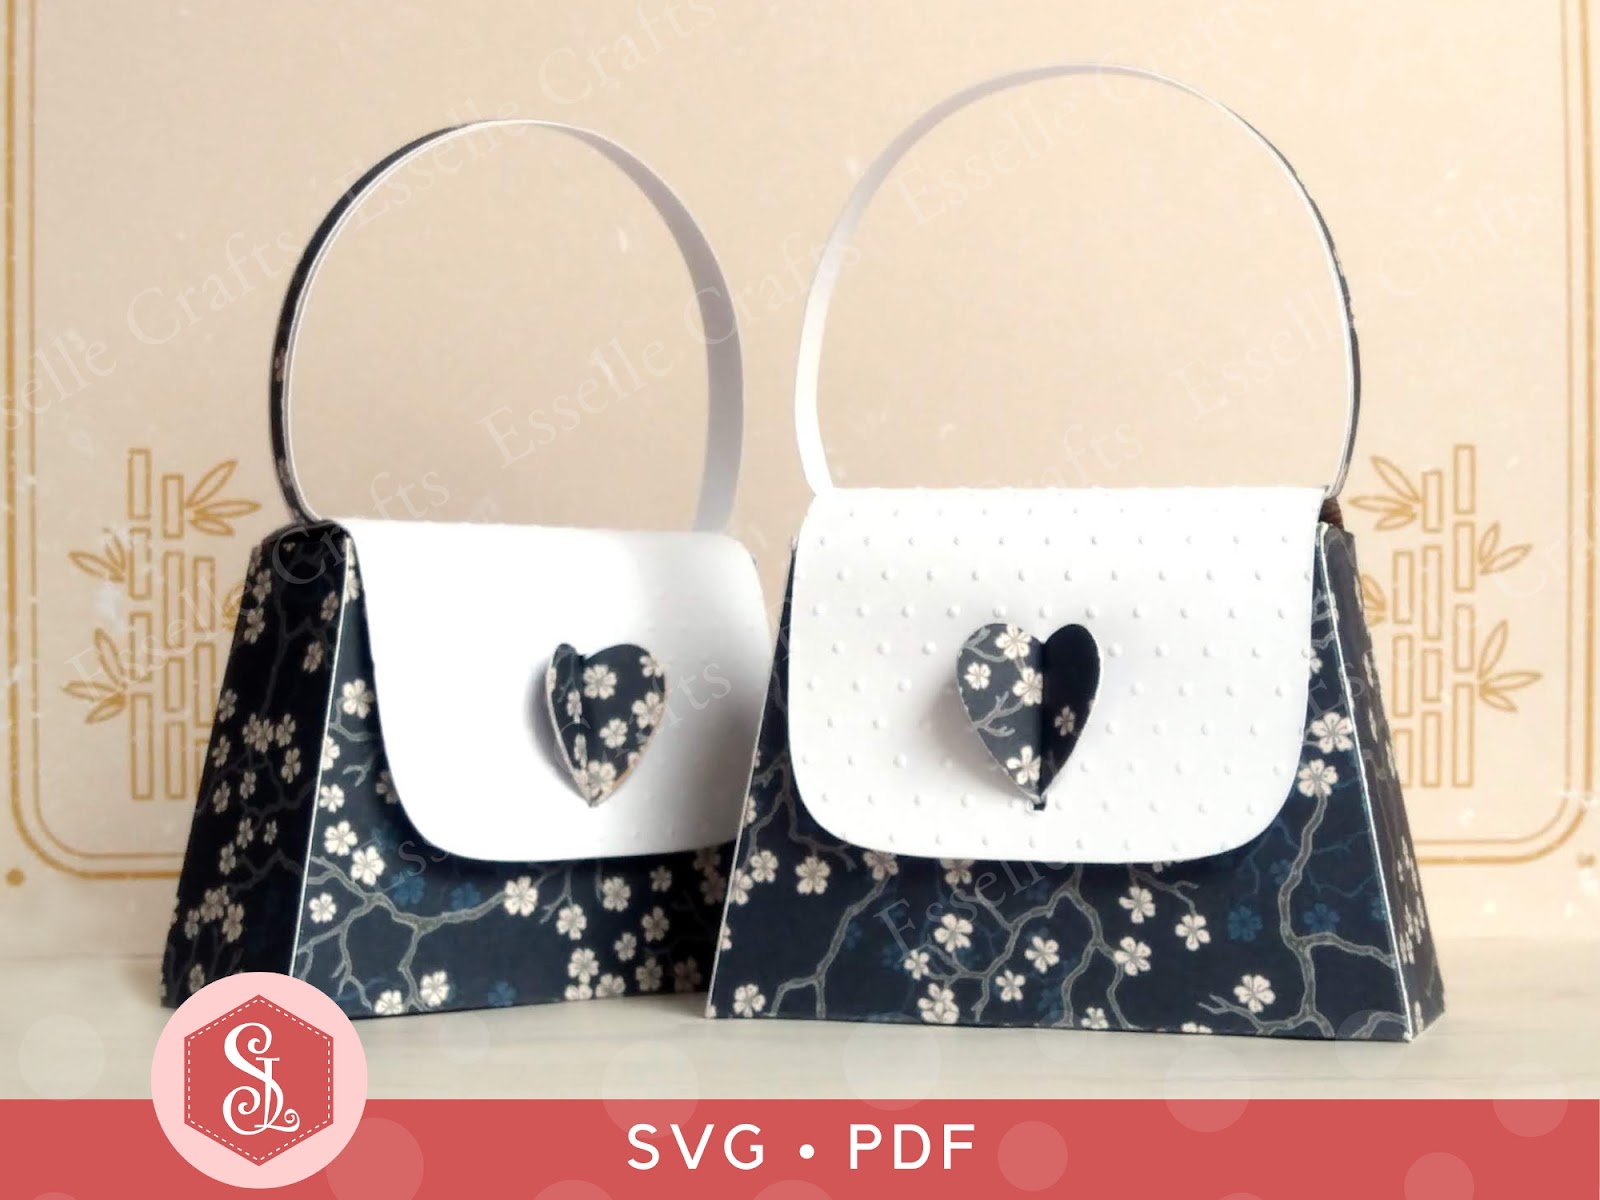
Handbag Favour Box

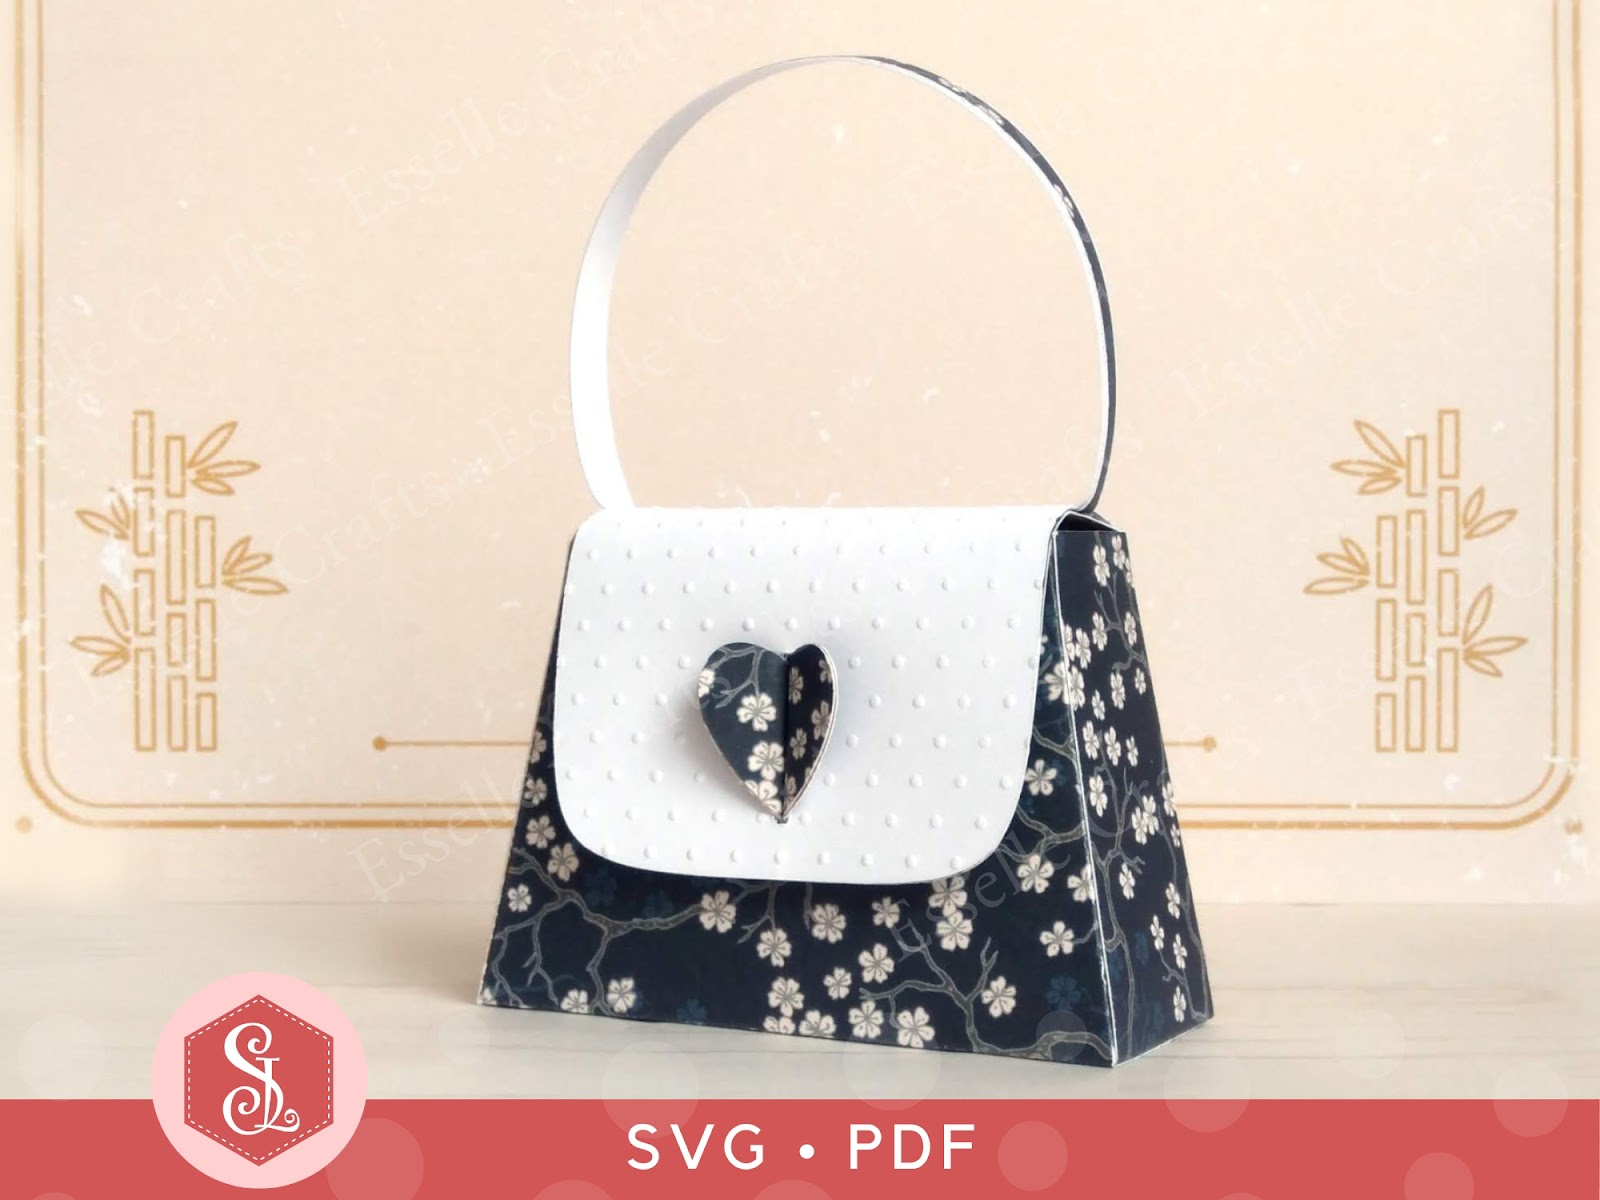
I wasn't sure whether to call this a favour box or a bag, but it certainly has plenty of room inside to carry some tasty treats!


Perfect for wedding favours, bridal showers, birthdays and Mother's Day, you can find the template for this cute, little handbag in my Etsy shop.


❤️ UPDATED January 2024 ❤️
I have now split the template up so that a larger sized bag can be made on a 12"x12" cutting mat. This means that it can now hold a standard sized gift card, as well as a lot more goodies!
To make one, you will need:

* Handbag Favour Box template (PDF and SVG available)
* Computer and printer to print the PDF template and instructions
* Digital cutting machine
* Double-sided cardstock (220-250gsm / 80-90lb recommended)
* Thinner card or paper for the lid panel (90-160gsm / 60-80lb recommended)
* Craft glue / double-sided tape
* Optional: Embossing folder

If you are not using a cutting machine you will also need:

* Craft knife / scissors
* Scoring tool
* Ruler

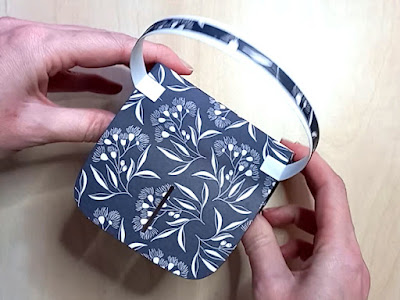
Watch my new and updated video tutorial showing how to assemble the handbag, and be sure to follow the tips below.


TIP 1: Make sure to glue the front base piece on top of the back base piece, so that it gives a neater finish at the front.


TIP 2: After gluing the handle panel on top of the handle, curl the handle into shape before the glue dries. Then, once it is glued in place, push the handle sides inwards slightly to give it a more defined shape.

TIP 3: If you are using plain paper or card for the lid panel, try embossing it first to give it some texture. I embossed mine with small polka dots.


TIP 4: After gluing the heart lock in place, pinch the heart at the front, then carefully slide a bone folder or a ruler in underneath the lid to allow the lid to open up. You can then press the heart lock into place more easily.


TIP 5: If you want to make a larger (or smaller) sized handbag, then you can easily resize the template. The base is very sturdy with its double layer, but if the contents are too heavy, then you may need to strengthen the handle by adding on another layer or two.


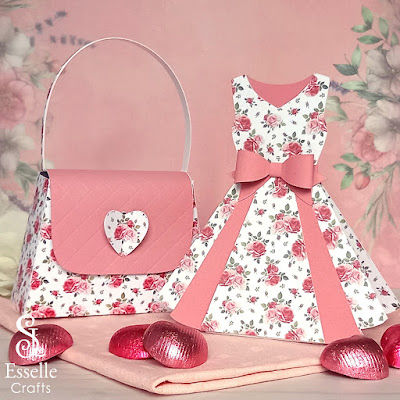
This beautiful pink version perfectly matches my dress favour box and would make wonderfully unique wedding favours!

I hope you are inspired to make some of these favour boxes for a special occasion, and I would love to see your beautiful creations. Feel free to share your photos of them with me on Instagram or Facebook.

Suzanne

Thursday, 5 August 2021

Upcycled Caravan Box

Welcome to another upcycling project! I am using my old favourite again - a Pringles tube - and this time I will be showing you how to turn it into an amazing little caravan box!

With an opening underneath, this sturdy box can be used as a money box, a treat box, a keepsake / storage box or even a unique little gift box. Without the opening, it would make a great ornament or centrepiece!

Upcycled Caravan Box by Esselle Crafts

Monday, 2 August 2021

Pumpkin Teapot Boxes

For Halloween this year, I decided to create a pumpkin treat box using my Teapot Favour Box template as a starting point. It's an idea that I've been working on for quite some time now, and here is the result!


Isn't it great! However, not satisfied with only having one design, I went ahead and created five more!

Monday, 12 July 2021

Union Flag Cupcake Boxes

My Union Flag cupcake favour box template has had a Great British makeover, and is now available in my Etsy shop as both an SVG cut file and a PDF.

Easy to assemble, these adorable little boxes have a removable lid and can be filled to the brim with sweets or small treats. Ideal for birthday parties, Royal wedding favours, British tea parties and more!

Thursday, 3 June 2021

Upcycled Rainbow Box

Time for another upcycling project! This time I will be turning an empty Pringles tube into a beautiful rainbow box!

From one Pringles tube, you should be able to make three or four rainbow boxes using the measurements below. They could be used as jewellery boxes, keepsake boxes or unique gift boxes. They are incredibly sturdy, and you can decorate them however you wish!

Saturday, 22 May 2021

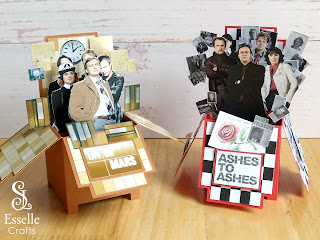
Life on Mars Box Card

Following on from my Ashes to Ashes box card design, I was asked recently if I could create one for Life on Mars. Well, how could I refuse?

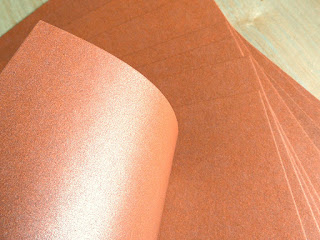
I started with a similar template to the one that I used for the Ashes to Ashes box card, and cut it out using my Cricut Explore Air 2. I chose a shimmery copper-gold cardstock this time, again to represent the colour of the car that was used throughout the Life on Mars series.

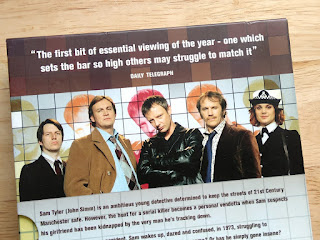
I then created four checkered panels to look similar to the background on the front of the DVD box (above), and printed them onto white cardstock.

Next, I found several photos of the five main characters and, after adapting them slightly, printed them onto glossy photo paper and cut them out.

I had to keep moving the characters around and adjusting their heights so that, once they were in place, they could all be seen from the front of the card.

I then added the Life on Mars logo - adapted from the DVD cover - to the front of the card.

For the added details, I used a picture of the clock from series 1 episode 6, and several other items from that episode. I kept all of the papers and folders / files very neat and orderly, because that's how Sam Tyler likes to work.

I am so pleased with how this box card has turned out, and it looks fabulous next to my Ashes to Ashes card.


Saturday, 15 May 2021

Graduation Cap Gift Box

With the end of the academic year fast approaching, this adorable little Graduation Cap Gift Box can be made quickly and easily to celebrate a forthcoming graduation.

You can choose to make the traditional black cap and tassel, or any variation of colours. 

Saturday, 24 April 2021

Winter Tree Box Card

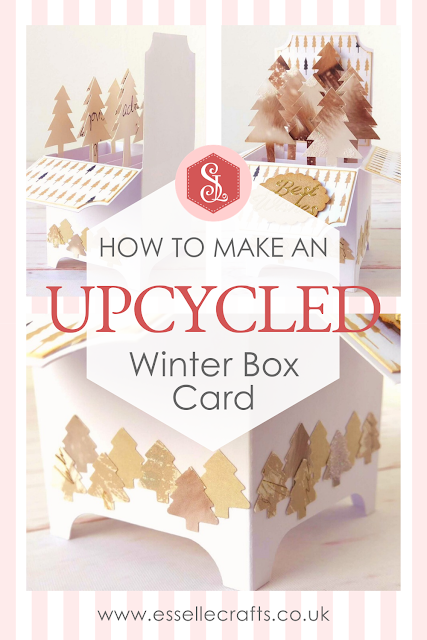
Recently, I was given a huge pile of used greeting cards, many of which cannot be recycled as they have glitter on them. So, this got me thinking ... Could I create some upcycled box cards out of them?

Quite a few of the cards were Christmas cards, so the first one that I created was this winter tree box card.


All of the elements, including the main box card itself, were made from upcycled Christmas cards. I used my Cricut Explore to cut the box card out, together with a simple tree template, then cut the remaining pieces out by hand.

The four decorative panels came from the front of a large Christmas card. There were lots of embellishments stuck to it with foam pads, so I tried to save as much of the lovely little tree pattern as I could.

The larger trees started life as a picture of a red squirrel! Hard to believe, I know, but here is the card as I was cutting them out using the tree template.

The reddish-brown colours are so rich and earthy, and the little sprinkling of snow makes them perfect for this winter card.

With the scraps of card that I had leftover, I cut some little tree shapes out using a craft punch, then glued them around the base of the box card.


I glued a white panel to the back of the box card, and left it blank, so that it could be used for a handwritten message.

Here is a view of the back, where you can see some of the handwriting from the original Christmas card. I chose to leave it like this to show that it is upcycled and totally unique!

I took the gold 'best wishes' lettering from another Christmas card, which I first had to soak in warm water to remove it. Then I punched a scalloped oval out of another card, inked around the edges with vintage brown ink and glued the gold lettering on.

I am really pleased with how it has turned out; 100% upcycled and 100% unique! Will you try something like this?

Happy crafting
Suzanne 

Friday, 16 April 2021

24oz Paper Teacup

Recently, I was asked if it was possible to create a large, 24oz teacup using my Teacup and Saucer favour box template. Not a problem, I replied, and to prove it, here's one that I made!

Ok, so I admit it doesn't look very interesting here, having been made entirely out of plain white cardstock, but it provided me with an enticing blank canvas to build upon ... 

And just look at it now!

Thursday, 8 April 2021

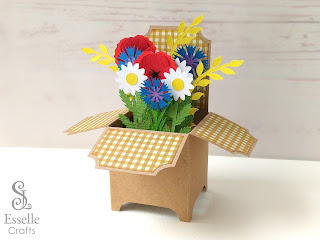
Cornfield Box Card

Blue cornflowers are my absolute favourite wildflower, and together with poppies and ox-eye daisies, they create a magnificent display from late spring, all the way through until early autumn.

My latest pop-up box card takes these vibrant colours and mixes them with pieces of yellow corn to create this beautiful little cornfield design.


Perfect for birthdays, Mother's Day, get well soon or just as a thank you, the inspiration to create it came from this lovely card that I received from a friend of mine last year.

Sunday, 21 March 2021

Ashes to Ashes Box Card

I started making pop-up box cards last year, at the start of the first lockdown. They seemed like the ideal way of sending a greeting card that had the added extra of a gift-like surprise thrown in! 

And this one has to be my favourite so far!