Thursday, 21 December 2023

Diamond Gem Box

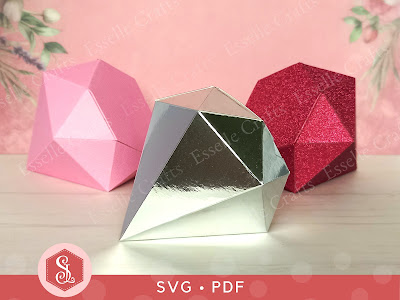
I was recently asked whether I could design a little favour box in the shape of a diamond 💎 and this is what I came up with!

I'm so pleased with how it's turned out! I've made it easy to open, and there's plenty of room inside for some sweet treats! It would work perfectly for wedding favours or as a cute gift box for Valentine's day!


You can find the template for this box in my Etsy shop, available as both SVG and PDF.

To make one, you will need:

Diamond Gem Box template (SVG and PDF available)
* Computer and printer to print the PDF template and instructions
* Digital cutting machine
* Cardstock (220-250gsm / 80-92lb recommended)
* Craft glue / double-sided tape

If you are not using a cutting machine you will also need:

* Craft knife / scissors
* Scoring tool
* Ruler

Watch my video tutorial below, showing how to assemble the diamond box.


TIP: try experimenting with different types and textures of cardstock to see which works best for you. This smooth, mirror card one is stunning, but the ruby glitter card one is definitely my favourite!


I hope that I have inspired you to create your own little diamond favour boxes using my template and I can't wait to see what you use them for! 💎

Suzanne 

Sunday, 3 December 2023

DIY Reusable Advent Calendar

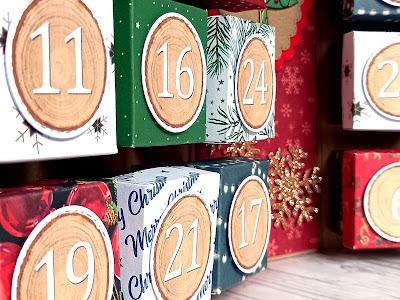
This year, I decided to make my own eco-friendly advent calendar! Although very time-consuming it was so worth the effort and it looks amazing! It can be reused year after year and can be filled with lots of different treats!


To make this advent calendar, I used:
  • festive patterned cardstock 230gsm / 85lb
  • festive patterned paper 90gsm / 33lb
  • thick card, such as grey board
  • strong tape, such as duct tape
  • brown wrapping paper
  • white cardstock 220gsm / 80lb
  • scissors / craft knife / paper trimmer
  • ruler
  • scoring board
  • craft glue
  • circular stitched die 4cm / 1.57" diameter
  • Sizzix Big Shot Foldaway
  • used Christmas card embellishments
Here's my video tutorial showing how I made it:


For the box lids, I cut out 24 pieces of patterned cardstock, each measuring 9.8 x 9.8cm / 3.85 x 3.85" and scored them at 1cm and 2.5cm / 0.4" and 1" on all four sides.

eco-friendly DIY reusable advent calendar

For the box bases, I cut out 24 pieces of patterned cardstock, each measuring 14.5 x 14.5cm / 5.7 x 5.7" and scored them at 1cm and 5cm / 0.4" and 2" on all four sides.

eco-friendly DIY reusable advent calendar

Next, I cut out two pieces of thick card, one for the front and one for the back, each measuring 17.5 x 24cm / 6.9 x 9.45" and another piece for the spine, measuring 9cm x 24cm / 3.5 x 9.45".

eco-friendly DIY reusable advent calendar

I used brown wrapping paper to cover the outside of the calendar and left approximately 2.5cm / 1" around the outside. Then I cut another piece to cover the inside of the spine, measuring 23 x 13cm / 9 x 5" and two pieces (one to cover the inside front and one to cover the inside back) measuring 23 x 16.5cm / 9 x 6.5".

eco-friendly DIY reusable advent calendar

I cut two decorative patterned paper panels for the front and back covers, each measuring 17 x 23.5cm / 6.7 x 9.25" and another panel for the spine, measuring 8.5cm x 23.5cm / 3.35 x 9.25".

eco-friendly DIY reusable advent calendar

I also cut a piece of patterned cardstock to cover the inside of the spine, measuring 8.5 x 23.5cm / 3.35 x 9.25".

eco-friendly DIY reusable advent calendar

I typed the numbers 1 - 24 onto images of a woodgrain slice, printed them onto white cardstock, then cut them out using a circular stitched die 4cm / 1.57" diameter.

eco-friendly DIY reusable advent calendar

eco-friendly DIY reusable advent calendar

Before I attached the boxes, I arranged them so that they were evenly spaced.

eco-friendly DIY reusable advent calendar

I then added three layers of scrap cardstock behind each of the numbers to give them more dimension. (Foam pads would work just as well, but, as you know, I don't like to use them.)


Once it was all assembled, I decorated the calendar with embellishments I'd saved from used Christmas cards!

eco-friendly DIY reusable advent calendar

eco-friendly DIY reusable advent calendar

It really was such a worthwhile project to make and will undoubtedly be a talking point for many years to come! I hope I have now inspired you to make one of your own!

Make an eco-friendly DIY reusable advent calendar

Happy crafting
Suzanne 🎄

Wednesday, 1 November 2023

Flower Topped Favour Box

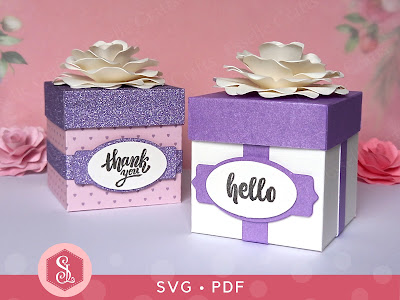
These adorable little flower topped favour boxes are perfect for wedding favours, bridal showers, Mother's Day celebrations and so much more!


Complete with an optional blank label, they can easily be customized for any occasion and can be filled to the brim with sweets or small treats!

Sunday, 3 September 2023

Chocolate Orange Pumpkin!

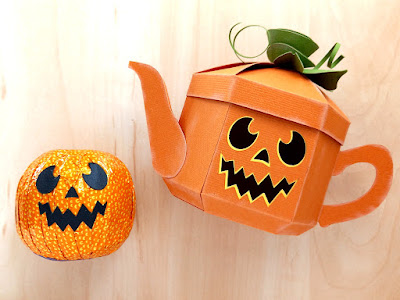
I recently updated all six of my Pumpkin Teapot Box templates so that they can now be made in a larger size on a 12" x 12" cutting mat. The best thing about this update, is that they are now large enough to hold a chocolate orange! 🎃

Can you see it?

I added some black features to the chocolate orange wrapper to match the teapot face and you can just about see it through the cut out face pieces, so it would still be a bit of a surprise as to what treat was hiding inside!

And here it is, out of hiding!

Saturday, 5 August 2023

Upcycled Favour Bags

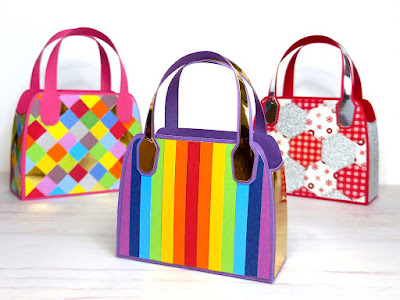
I've recently been experimenting with my butterfly favour bag template, seeing what other versions I could come up with, and just look at what I've created!

Aren't they fabulous!?

Most of the bags are decorated with small paper scraps, and I upcycled old greeting cards, Christmas crackers and card packaging for the others ♻️

My favourite has to be the Guinea pig bag, made using a tissue box.

I started by making the bag out of Kraft card, then I cut the front and back panels from the front and back of the tissue box and the two side panels from the picture on the base of the box. I went around the edges of the panels with a gold metallic marker pen before gluing them on, then cut the handle panels from gold mirror card.

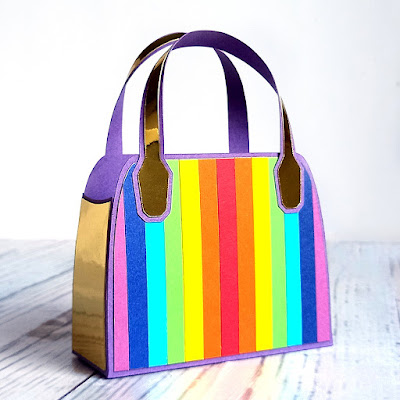
For this rainbow bag, I reduced the size of the template slightly and cut the main bag pieces out of an old school book cover. I then cut the front and back panels out of white copy paper. I found lots of different coloured cardstock scraps and cut them into thin strips. Then I glued the red strip down the centre of the front and back panels and filled the rest with the other colours. After trimming any ends off, I went around the edges with a gold metallic marker pen, then cut the two side panels and the handle panels out of gold mirror card.

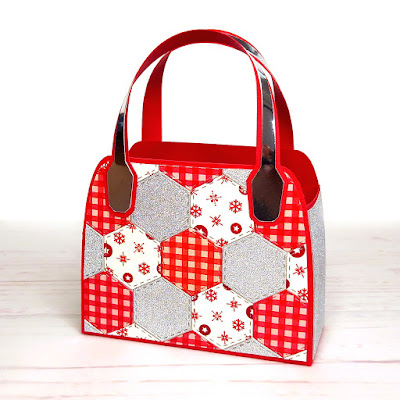
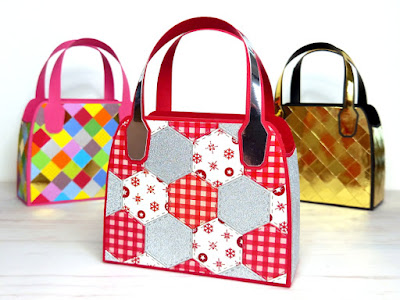
For this next one, I made the bag out of red cardstock, then cut a front and back panel out of white copy paper. I die cut small hexagons from old Christmas crackers (that I had saved from a couple of years ago) and glued them onto the panels to make a patchwork effect. I then cut the two side panels out of a larger piece of glittery, silver cracker and cut the handle panels out of silver mirror card.


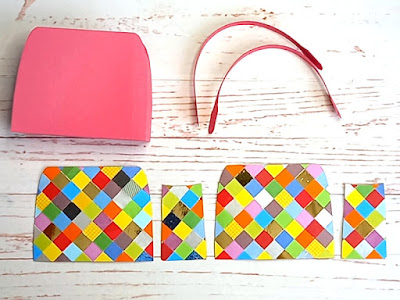
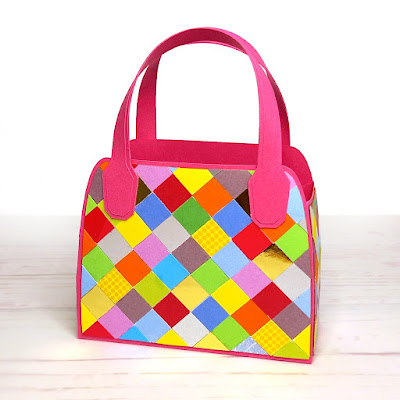
The pink card that I used for this next bag was an old A4 folder divider that I no longer needed. Again, I cut the front and back panels and two side panels from copy paper, then found lots of small scraps of cardstock, greeting cards and food packaging and punched out as many squares as I could using my 1.1cm square punch.

Call me obsessive, but I really wanted all of the edges to match up so that it looked like a candy wrapper bag, and here's how the panels looked once I'd finished.


Before I glued them on, I ran the panels through my Big Shot to flatten them and it gave them a nice smooth finish.


I made this next one in a similar way, using scraps of gold mirror card. Running these panels through my Big Shot created almost a matt finish, and I went around the edges with a gold metallic marker pen afterwards to hide the white core.

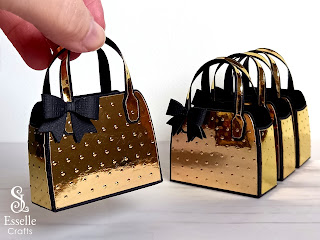
It's very similar to the mini gold handbags that I made using the same template.

I'm completely obsessed with making these bags now, and will definitely be making more!

Watch this space!

Suzanne

Friday, 28 July 2023

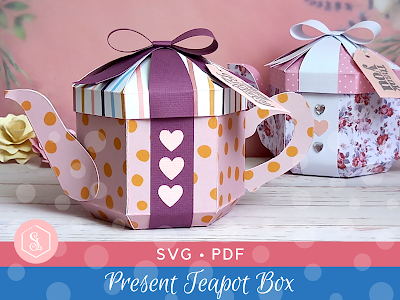
NEW Present Teapot Box

I am so excited to introduce you to my NEW updated Present Teapot Box! 

Perfect for gifting sweets or small treats, these teapot boxes are all wrapped up and ready to make someone smile! ❤️

Wednesday, 3 May 2023

Tuxedo Favour Box

Following on from my very popular shirt favour boxes, I have now created a template for a super stylish tuxedo favour box!

Available as an SVG cut file, as well as a PDF if you prefer to cut out by hand, you can find the templates for this stunning box in my Etsy shop as an instant download.


Ideal for birthdays, Father's Day or wedding favours, these little boxes are easy to assemble, and are perfect for gifting sweets or small treats! They can even hold a gift card!

Thursday, 27 April 2023

Flower Favour Box

Similar in design to my Beehive Favour Box and my Graduation Star Box, this pretty Flower Favour Box is super easy to make, and can be filled with sweets or small treats!

Perfect for birthday parties, Mother's Day gifts, wedding favours and more, the template for this box is available through my Etsy shop as an SVG cut file, as well as a PDF if you prefer to cut out by hand.

Wednesday, 12 April 2023

Mini Gold Favour Bags

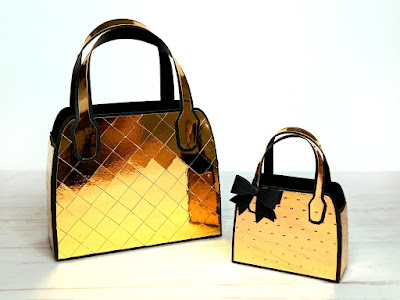
Following on from when I introduced you to my butterfly favour bags, I have been experimenting with different sizes and have created these cute mini black and gold bags!

Black and Gold Favour Bags by Esselle Crafts

I used gold mirror card for the panels and, instead of using the butterfly, I embossed each of the panels with small polka dots. I kept the bows as an extra embellishment, despite the fact that they were so ridiculously tiny to make!

Saturday, 8 April 2023

Graduation Gown Box

These fabulous Graduation Gown Boxes are perfect for any academic celebration and can be filled with small treats or congratulatory messages! 🎓 They are also designed to hold a gift card!

They can be made in two different ways - with a shirt (and optional tie) or with a round necked top!

Saturday, 1 April 2023

How to Print my Digital Papers

Following on from my previous post, where I introduced you to my Bee Hive Favour Box, I have now created a quick video tutorial to show you how to print the two FREE digital papers that come with the template

Bee Hive Digital Papers by Esselle Crafts

I recommend that you print the digital papers onto white photo quality matte card, approximately 220gsm. But if you don't want to use the digital papers, then you can use any double-sided patterned card or just plain yellow card to create the box.

Sunday, 12 March 2023

Bee Hive Favour Box

After making my graduation star box, I kept looking at the shape of it and soon realized that it looked just like a bee hive! So, without too much alteration, I now have a template for a bee hive box!


It's held closed with a length of raffia (or you could use ribbon), and once it's released, the box opens like an explosion of bees to reveal the gift inside!

Saturday, 25 February 2023

SVG Dress Favour Box

In addition to my shirt favour boxes, you can now make your very own dress favour box! With room inside for some sweets or small treats, this box would make a wonderful gift for weddings, bridal showers, Mother's Day, birthdays and so much more! 
Isn't it fabulous! The template is available through my Etsy shop as an SVG cut file, as well as a PDF if you prefer to cut out by hand.

Sunday, 5 February 2023

Graduation Star Box

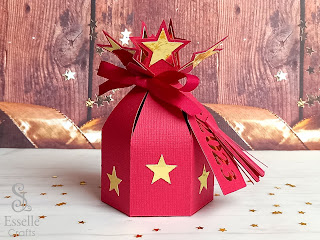
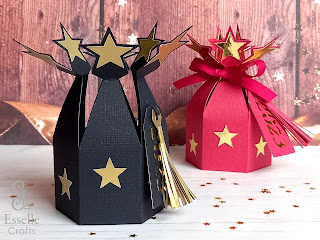
Do you know someone who's graduating soon? Are they a star in your eyes? Then this cracker-style graduation star box will be perfect for gifting them a special treat!

It's held closed with a ribbon, but once that's released, the box opens like an explosion of stars to reveal the gift inside! ⭐️

Sunday, 29 January 2023

SVG Biscuit Box Card

It's time for another 3D box card design, and for this one I was inspired by the boxes of assorted biscuits that are so popular around Christmas time!

Displaying a tempting assortment of biscuits, this card folds flat for easy posting, and is available through my Etsy shop as an SVG cut file.